
One of the conditions I set when I moved to the new shop was that I needed a better bandsaw. That was two years ago; I think I can now give a fully-formed opinion on the saw I purchased back then.
A good bandsaw is one of the few tools I really think I couldn't live without. As a luthier, I hoped to find one that would have the capacity to resaw wood for guitar tops and backs up to 9" thick. That way I can use any lumber (including my black walnut log), not just precut stuff from luthier supply companies.
I decided on the Craftex CX100, which was brand new at the time. It's sold through Busy Bee Tools, which has a location in Ottawa so I was able to see it before buying it. On paper it seems perfect: the small footprint and modest (relatively speaking) weight of a 14" bandsaw, with 13" resaw capacity, 2hp 220v motor, ball-bearing rollers guides, good-quality fence, one-piece steel construction, and by far the lowest price in its class at around $1000. Could it be too good to be true?
Two years later, I'm come to grips with all of its idiosyncracies. First, the good: It really is a terrific, well-made saw. The fundamentals are what matter most- the frame is very stiff, the wheels are well-balanced and true, and the motor has more power than I could ever need. Dust collection is quite good if you have a powerful collector unit, and the extruded aluminum guides are adequate and easy to use.
The other essential is the ability to adjust the saw for best performance. A bandsaw is only as good as it's operator: if the blade is not tracking straight and true, if the guides cannot be set correctly, if the table and fences aren't square, then even the best saw will not give good results. A top-quality north american or european saw will make it easy to dial in the perfect set-up; cheaper taiwanese machinery like the CX100 requires a little more effort and saavy, but the adjustability is there.
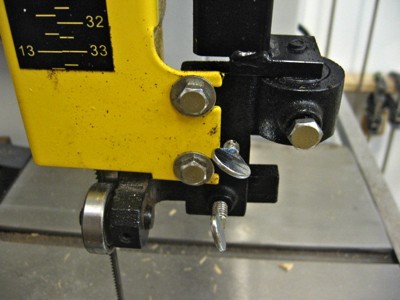
A lot of it is done using eccentric circles with locking set screws. For example, to bring in the blade guides you'd loosen the set screw, rotate the guide to the desired position, and tighten the screw. Almost every aspect of the bade guides can be adjusted linearly and rotationally. This is pretty great, but in practice it's rather finicky. It takes some force to lock the parts so they don't slip, and with that comes the risk of scarring the surfaces, which can throw off the registration of components. Some parts are rough cast iron where it would have been nice to find a machined surface. The upper wheel tracking adjustment mechanism is simply two bolts with knob heads, through holes drilled and tapped directly in the sheet metal of the frame. It really would have been a good idea for them to weld on a couple of nuts there.
In other words, when you unpack the machine, you can't assume that anything will be adjusted correctly. You will have to have a good mechanical mind to get everything dialled in perfectly without stripping any threads or screw heads, and it'll take a few hours, a few scrap pieces of wood, and perhaps a spare blade too. But at least it can be done.
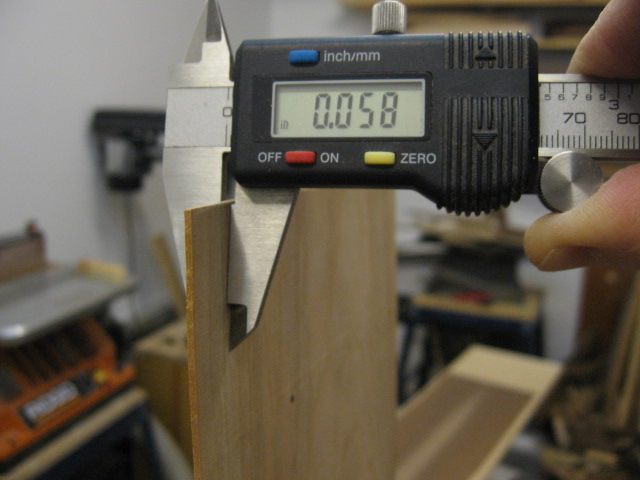
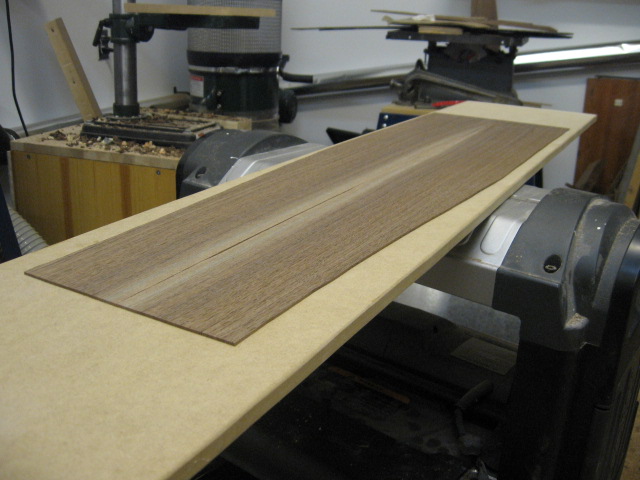
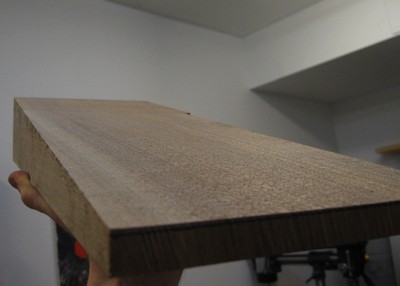
Speaking of blades, the one that is shipped with the saw is junk, plain and simple. Use it to get the guides and table lined up, and then put on a proper blade. I like to use Timberwolf blades from Suffolk Machinery, though I've heard good things about Highland Hardware's "Woodslicer" blades, and any silicon-steel blades will do in a pinch. Here's the kind of surface I can get, on walnut:
It hasn't all been smooth sailing. I've burned out two thrust bearings, and when one of those seized up in the middle of resawing a big chunk of ebony, it got so hot that it warped a nice new resaw blade (and wasted a small but resonably valuable slice of wood). I've had blade guides wiggle loose, resulting in excess blade wander in the middle of a cut. Still, now that I've experienced those issues I know how to avoid them, namely by getting higher-quality ball-bearing rollers and appling the right amount of torque to the set screws. So in the end, with a little elbow grease and trial and error, I've got a workhorse that can do job of a saw three times the price. It has paid for itself already in allowing me to use lower-priced raw lumber to make my own tonewoods, along with doing everyday cutting work. There's no denying the incredibly good value of this saw; it's just not a plug-and play proposition.