The ultimate luthier's vise

An essential part of my workbench is this modern patternmakers' vise:

As you can see, it can hold odd-shaped parts at unusual angles, making it a lot easier to carve the complex three-dimensional shapes that guitar are made of.

It is based on original designs by Joseph Emmert, and patented way back in 1919. Like so many others, Emmert Manufacturing went out of business in the 1970s. Lee Valley Tools developed and sold an improved, canadian-made version for a while, but now it too is unavailable and highly sough after. The one that I use is an inexpensive reproduction made in the far east. I doubt it is as precise or sturdy as the real thing, but it works.

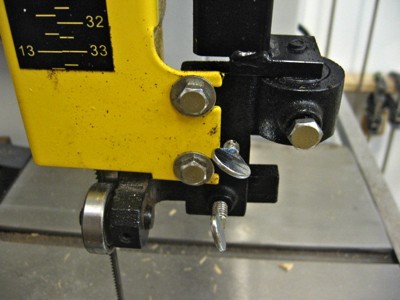
You can see why these are so useful: the whole vise can be pivoted from vertical to horizontal orientation, and rotate 360 degrees. I use this feature all the time to hold necks at a comfortable angle for carving with a rasp and spokeshave. The jaws open 13", and the outer one can be quickly skewed 5 degrees left or right to hold wedge shapes, like the bodies of some of my ergonomic electric guitars. An auxiliary insert can hold pieces at up to 20 degrees of skew. And by flipping the face 180 degrees, I have a set of small jaws perfect for holding nuts and saddle blanks while they're being shaped.

Truly this is the ultimate luthier's vise.

Tool Review: Craftex CX100 Bandsaw

One of the conditions I set when I moved to the new shop was that I needed a better bandsaw. That was two years ago; I think I can now give a fully-formed opinion on the saw I purchased back then.

A good bandsaw is one of the few tools I really think I couldn't live without. As a luthier, I hoped to find one that would have the capacity to resaw wood for guitar tops and backs up to 9" thick. That way I can use any lumber (including my black walnut log), not just precut stuff from luthier supply companies.

I decided on the Craftex CX100, which was brand new at the time. It's sold through Busy Bee Tools, which has a location in Ottawa so I was able to see it before buying it. On paper it seems perfect: the small footprint and modest (relatively speaking) weight of a 14" bandsaw, with 13" resaw capacity, 2hp 220v motor, ball-bearing rollers guides, good-quality fence, one-piece steel construction, and by far the lowest price in its class at around $1000. Could it be too good to be true?

Two years later, I'm come to grips with all of its idiosyncracies. First, the good: It really is a terrific, well-made saw. The fundamentals are what matter most- the frame is very stiff, the wheels are well-balanced and true, and the motor has more power than I could ever need. Dust collection is quite good if you have a powerful collector unit, and the extruded aluminum guides are adequate and easy to use.

The other essential is the ability to adjust the saw for best performance. A bandsaw is only as good as it's operator: if the blade is not tracking straight and true, if the guides cannot be set correctly, if the table and fences aren't square, then even the best saw will not give good results. A top-quality north american or european saw will make it easy to dial in the perfect set-up; cheaper taiwanese machinery like the CX100 requires a little more effort and saavy, but the adjustability is there.

A lot of it is done using eccentric circles with locking set screws. For example, to bring in the blade guides you'd loosen the set screw, rotate the guide to the desired position, and tighten the screw. Almost every aspect of the bade guides can be adjusted linearly and rotationally. This is pretty great, but in practice it's rather finicky. It takes some force to lock the parts so they don't slip, and with that comes the risk of scarring the surfaces, which can throw off the registration of components. Some parts are rough cast iron where it would have been nice to find a machined surface. The upper wheel tracking adjustment mechanism is simply two bolts with knob heads, through holes drilled and tapped directly in the sheet metal of the frame. It really would have been a good idea for them to weld on a couple of nuts there.

In other words, when you unpack the machine, you can't assume that anything will be adjusted correctly. You will have to have a good mechanical mind to get everything dialled in perfectly without stripping any threads or screw heads, and it'll take a few hours, a few scrap pieces of wood, and perhaps a spare blade too. But at least it can be done.

Speaking of blades, the one that is shipped with the saw is junk, plain and simple. Use it to get the guides and table lined up, and then put on a proper blade. I like to use Timberwolf blades from Suffolk Machinery, though I've heard good things about Highland Hardware's "Woodslicer" blades, and any silicon-steel blades will do in a pinch. Here's the kind of surface I can get, on walnut:

It hasn't all been smooth sailing. I've burned out two thrust bearings, and when one of those seized up in the middle of resawing a big chunk of ebony, it got so hot that it warped a nice new resaw blade (and wasted a small but resonably valuable slice of wood). I've had blade guides wiggle loose, resulting in excess blade wander in the middle of a cut. Still, now that I've experienced those issues I know how to avoid them, namely by getting higher-quality ball-bearing rollers and appling the right amount of torque to the set screws. So in the end, with a little elbow grease and trial and error, I've got a workhorse that can do job of a saw three times the price. It has paid for itself already in allowing me to use lower-priced raw lumber to make my own tonewoods, along with doing everyday cutting work. There's no denying the incredibly good value of this saw; it's just not a plug-and play proposition.

Resurrection

Woodworkers and musicians have a couple of common fetishes: stuff that's old, and stuff that's cheap. Luthiers of course get a double dose of that impulse. So imagine my joy when I was given this five dollar garage-sale special:

This is not just some rusty old handplane; according to Patrick Leach's "Stanley Blood and Gore" (the best reference for old Stanley/Bailey bench planes) this is an authentic Bailey #4½ made between 1902 and 1920.

Despite its age, there is only superficial rust, and amazingly all the parts are there. After disassembly, the first thing to do was to clean off all the dirt and rust. Here I'm scouring off the sole using an extra-fine brass wire wheel in the drill press:

Works like a charm! The castings are all very precisely-made and fine-grained, and the lever cap is even nickel-plated. Even the black paint is still glossy under the dust. The original blade, however, is rather thin steel, and it had enough rust pitting that I decided to replace it with an A2 blade from Lee Valley. The original tote was broken pretty badly, and obviously glued back together misaligned, before subsequently being broken again. I decided to replace both the tote and knob.

Notice that I made my own knob much taller than the original. The short knob is a design flaw with these old planes that makes them uncomfortable to use. It was corrected around 1920- that's how I know mine is older than that. I made the new ones of Jatoba, which is not quite so beautiful or pleasant to touch as the original rosewood but quite a bit cheaper and tougher. This is after all going to be a working tool, not a showhorse.

There were a couple of details that needed attending to in order for the plane to work to its ultimate potential. The mouth needed a very slight widening to accomodate the thicker modern blade. Some judicious filing ensured that the frog seated perfectly in the body. Most importantly, to work properly, it needs a flat sole. This plane had obviously been used a fair bit, but had never had the sole lapped. After assembling to put the correct tension on the casting, I stuck some PSA-backed sandpaper to a flat granite slab, and rubbed in a figure-8 pattern until it was done.

All done, and much better than new! Considering the time it took to resurrect this old workhorse, I probably could have just gone and got myself a new Veritas bevel-up smoother that would work at least as well. But what would be the fun in that?


New Year, New Start

Finally, Sankey Guitars now has a proper workshop! After moving to a new house I finally got the opportunity to create a space dedicated to building guitars. Can you believe this used to be a garage? I knew I could use it for something more than parking a car. All it took was a little drywall and paint, and insulation, oh, and vapour barrier, electrical, flooring, etc.... Okay, so it turned out to be a lot of work. But it was worth it: The new workshop is ten by twenty feet of high-ceilinged, fully insulated and ventilated, forty amp powered goodness. I've already started work on the next project. It's very interesting- watch this space, you'll find out more soon.