
AN ARCHTOP GUITAR IS NOT A VIOLIN (IT’S A VIOL)
PART TWO: BUILDING “LA CREMONESE”
I didn’t want to simply theorize about how an arch top guitar with viola da gamba elements might sound. I wanted to find out for real. So I set about creating one. “La Cremonese” is (as far as I know) the first guitar in the modern era with a coopered soundboard. It is a classical guitar, a lightweight, small-bodied instrument intended for nylon strings. As you can hear, I ended up with an instrument capable of making pleasing sounds, despite my clunky playing. It was the end result of a lot of experimentation, testing, and some leaps of faith.
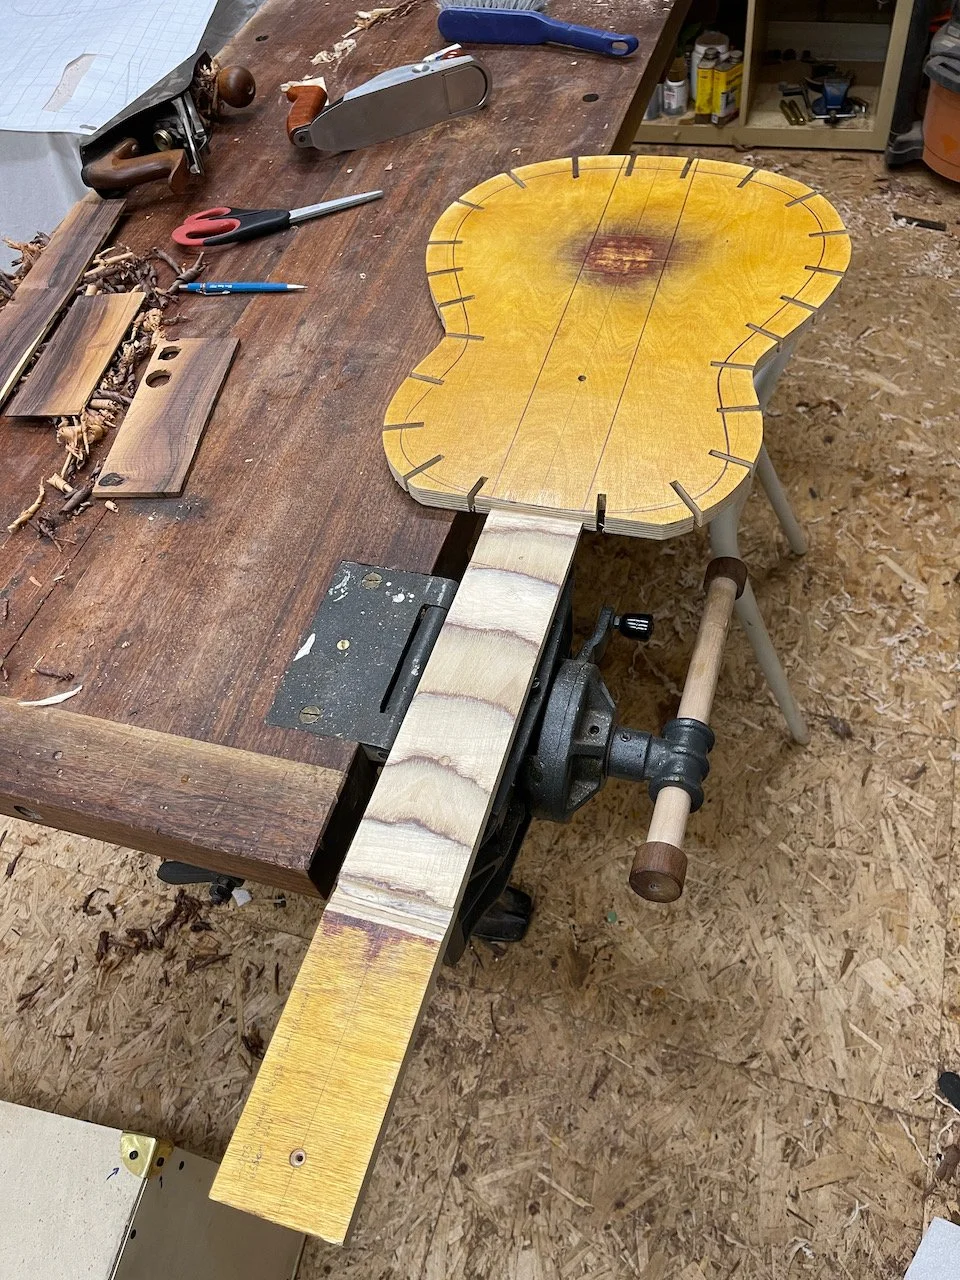
The first big decision I had to make was whether I should use a mould or solera to build the guitar. It serves as the foundation of everything after, and profoundly affect every aspect following. On the one hand, most instruments with carved tops are build around a mould since they don’t have a flat reference surface in front. But this is after all a nylon-strung guitar, and we don’t know exactly how early viols were made. I decided to build up the body and neck in the manner of a spanish guitar, but to attach the soundboard after. I simply needed to make a minor change to an existing solera to accomodate the neck angle.
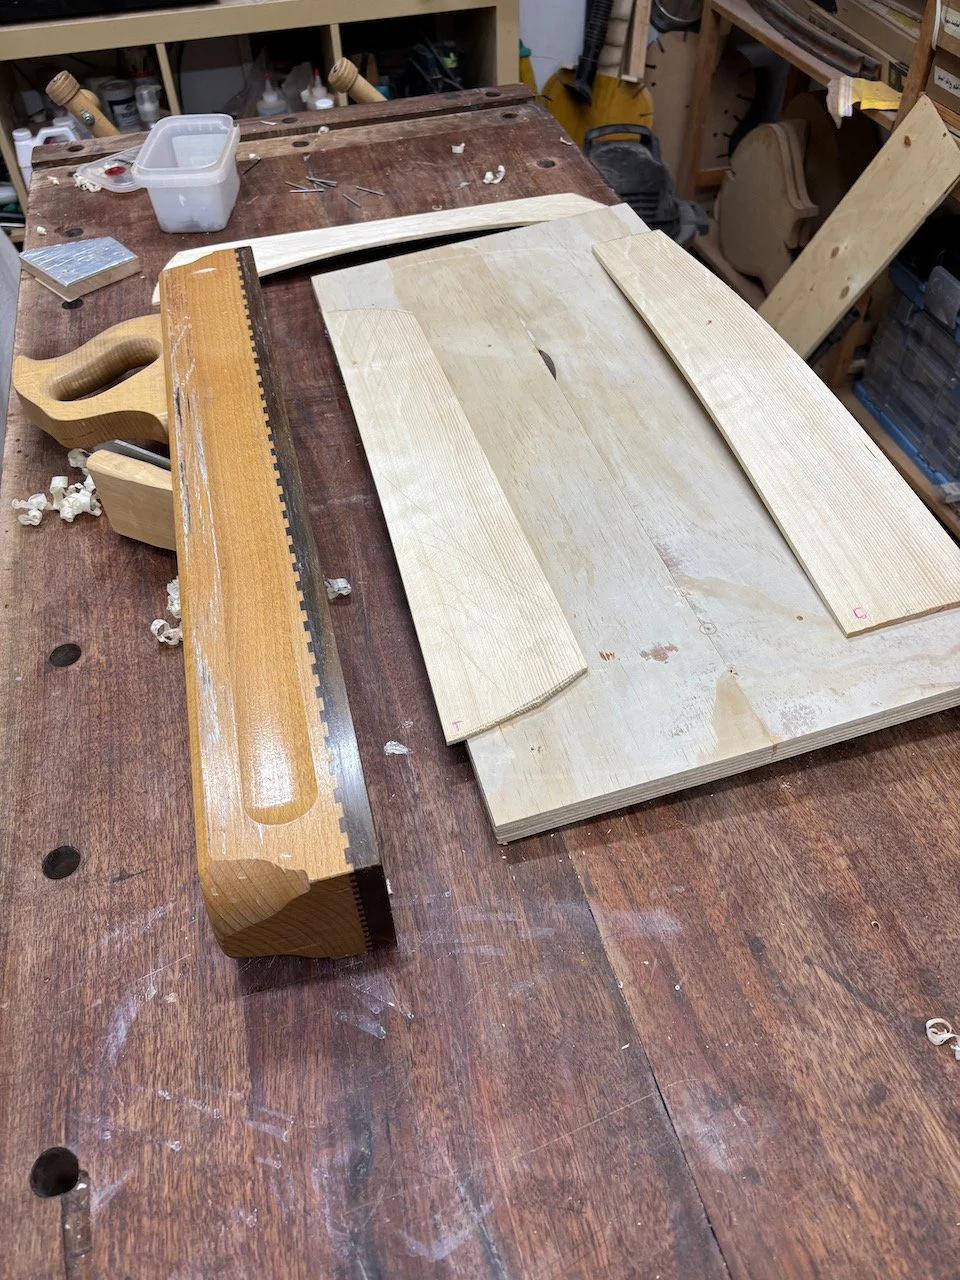
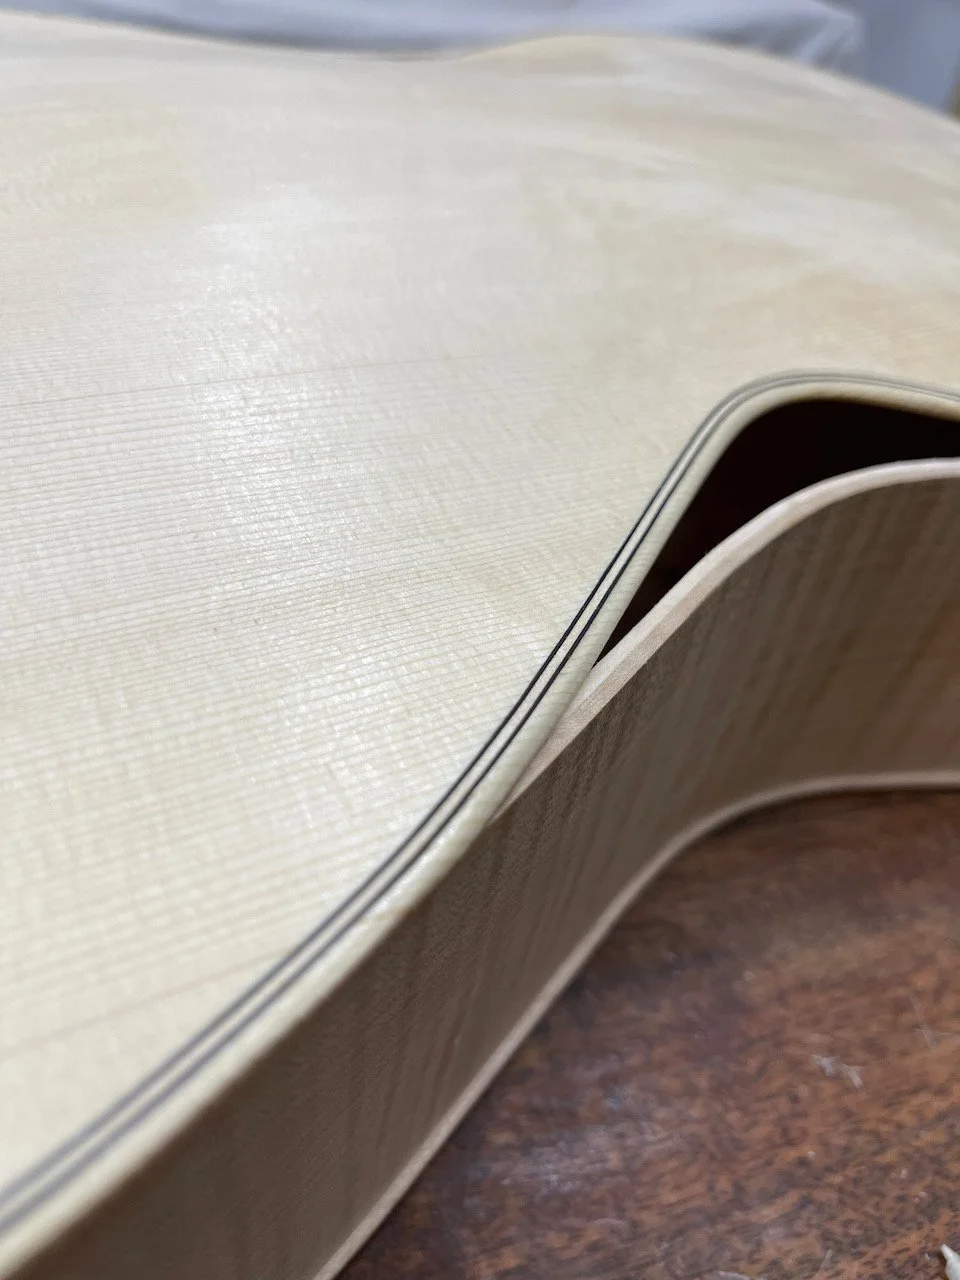
The most unusual aspect of “La Cremonese” is its soundboard. It will be made in the manner of baroque-era english viols, by joining together multiple sections of wood that have been already bent to an arch. This is referred to as a “coopered” top, since the method is similar to how wooden barrels are made.
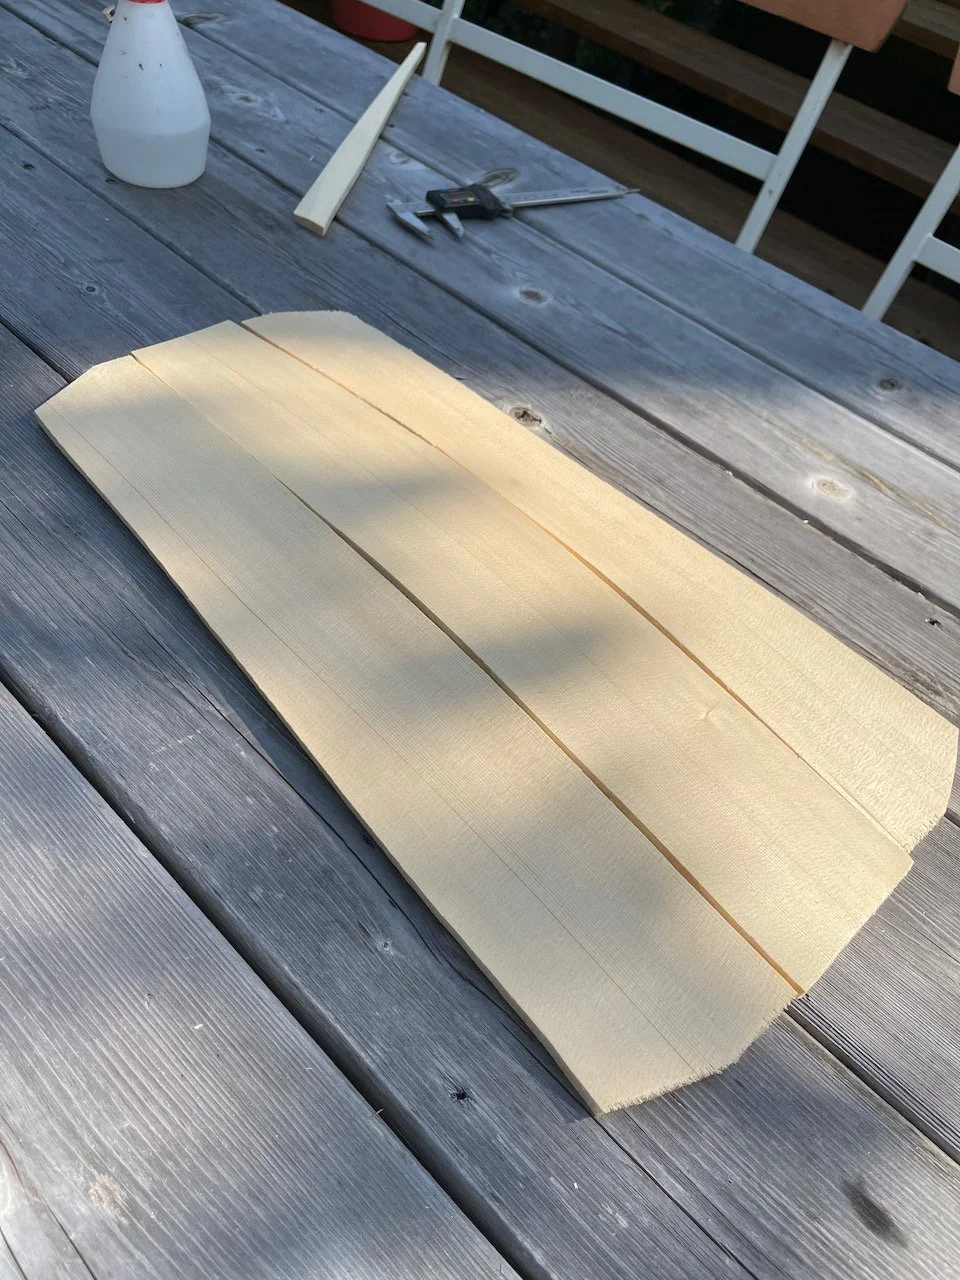
To obtain the stiffest and strongest soundboard, hand-split spruce is the way to go. This way each individual wood fibre runs continuously from one end of the plank to the other. In addition, the split will follow the plane of the medullary rays, for maximum cross-grain stiffness too.
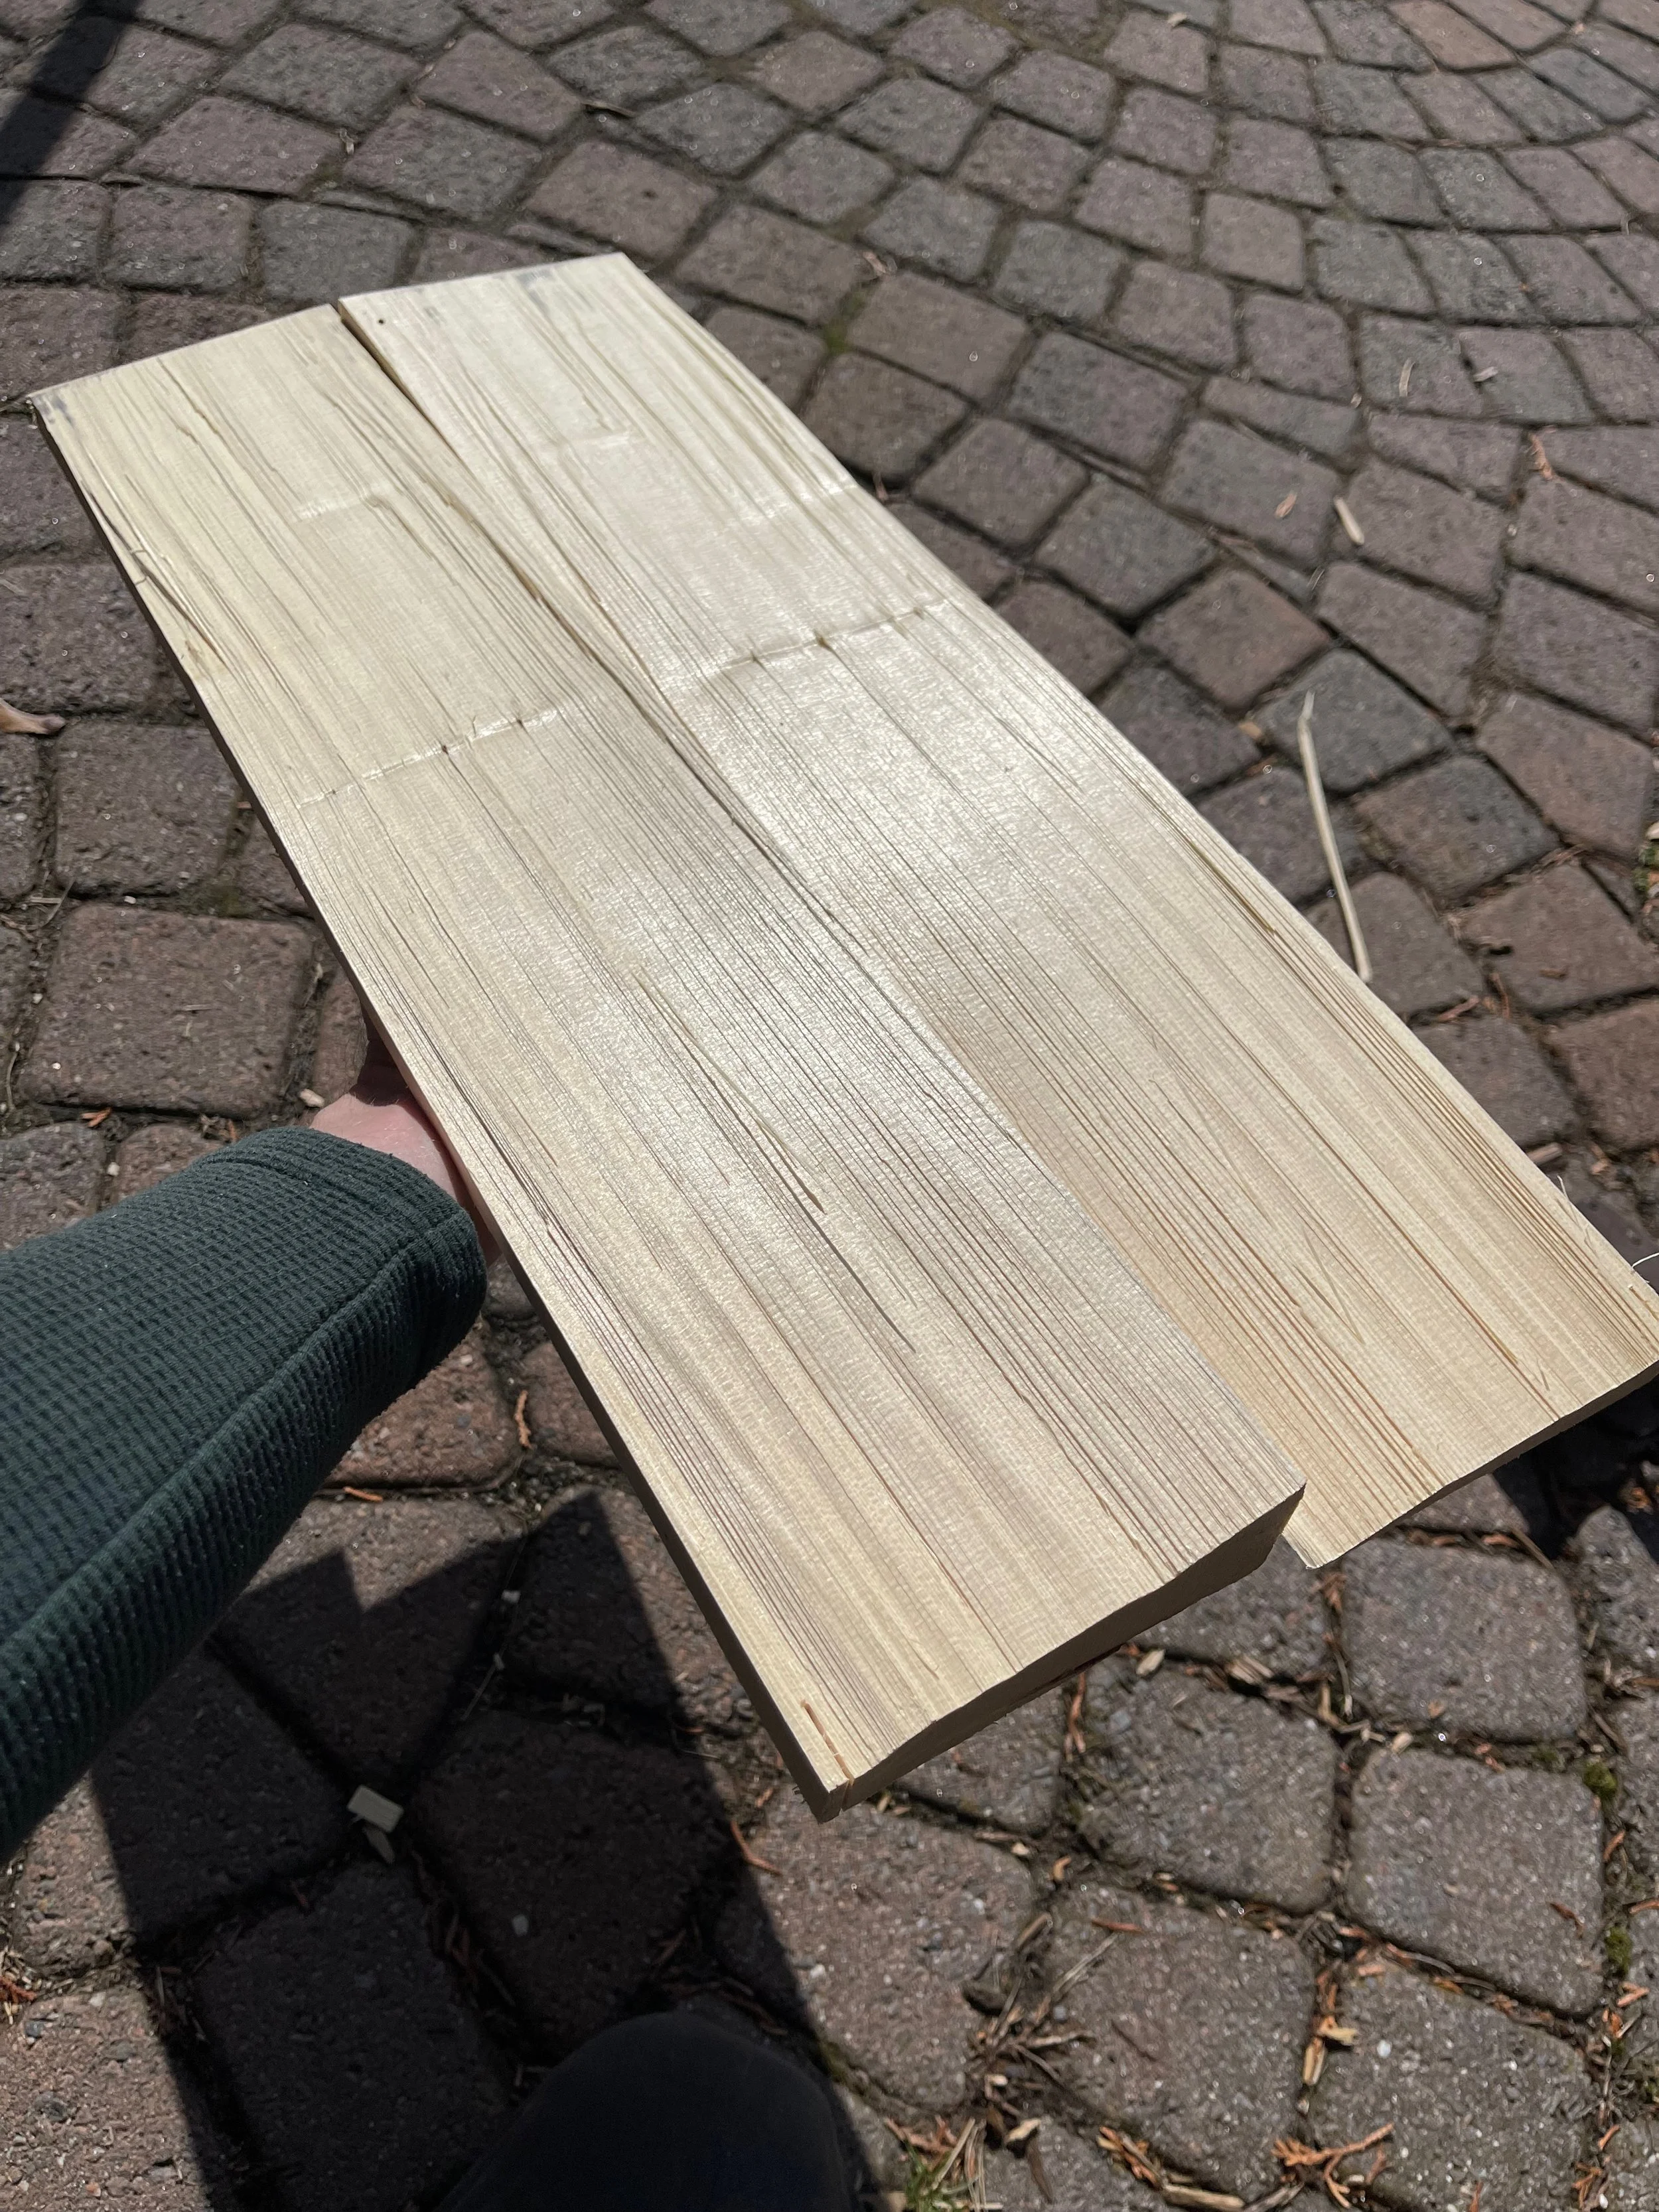
This is eastern Canadian white spruce, obtained from a local home improvement store. It wasn’t a large tree, but grew slowly and evenly, with relatively tight and consistent grain lines. Even so, it doesn’t split perfectly- it’s probable that my technique isn’t very good. And those pin knots are pretty small- they’ll plane out quickly.
That was very quick and easy! Spruce is soft and easy to work with, as long as there’s no runout. Being split, the grain is very straight. Look at that glossy surface.
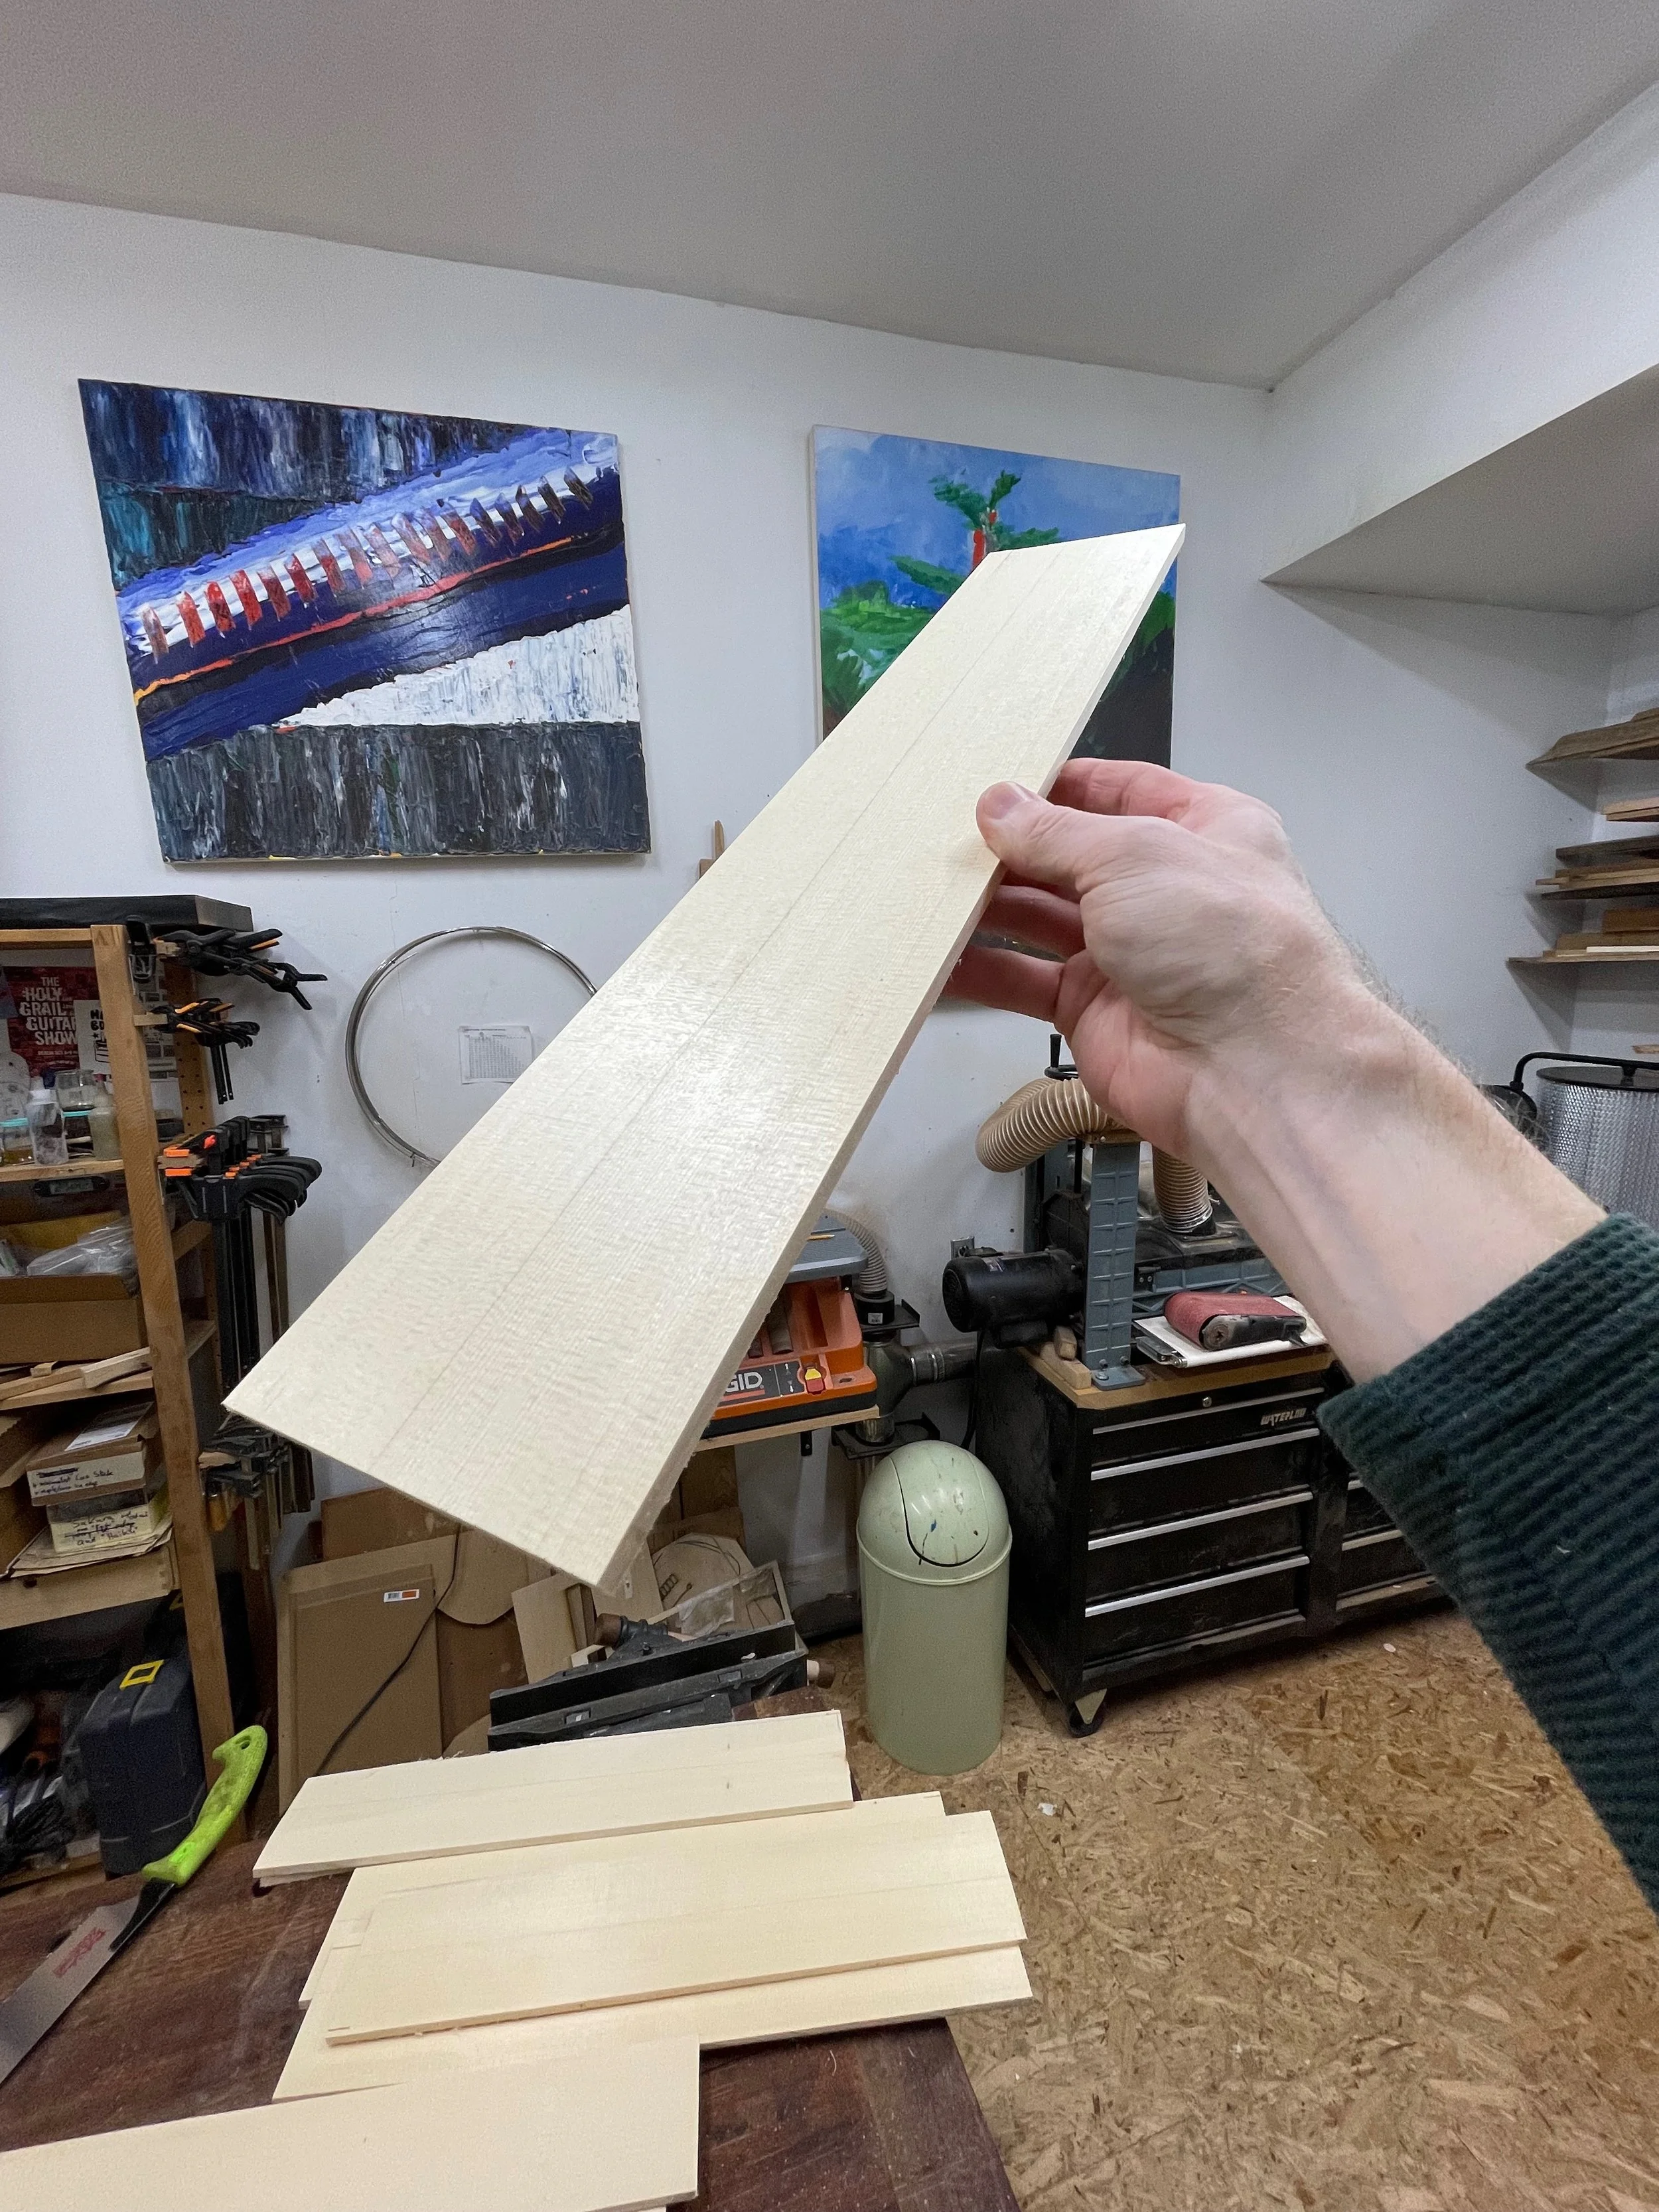
The soundboard staves being bent to shape. The central stave is easy. The side ones are trickier; it’s a complex curve, not a simple bend perpendicular to the grain. To achieve that, we have to bend the wood at an angle. Each stave is over 6mm thick, so it takes a lot of force and patience to get it to bend, and stay bent, as you can see in the video.
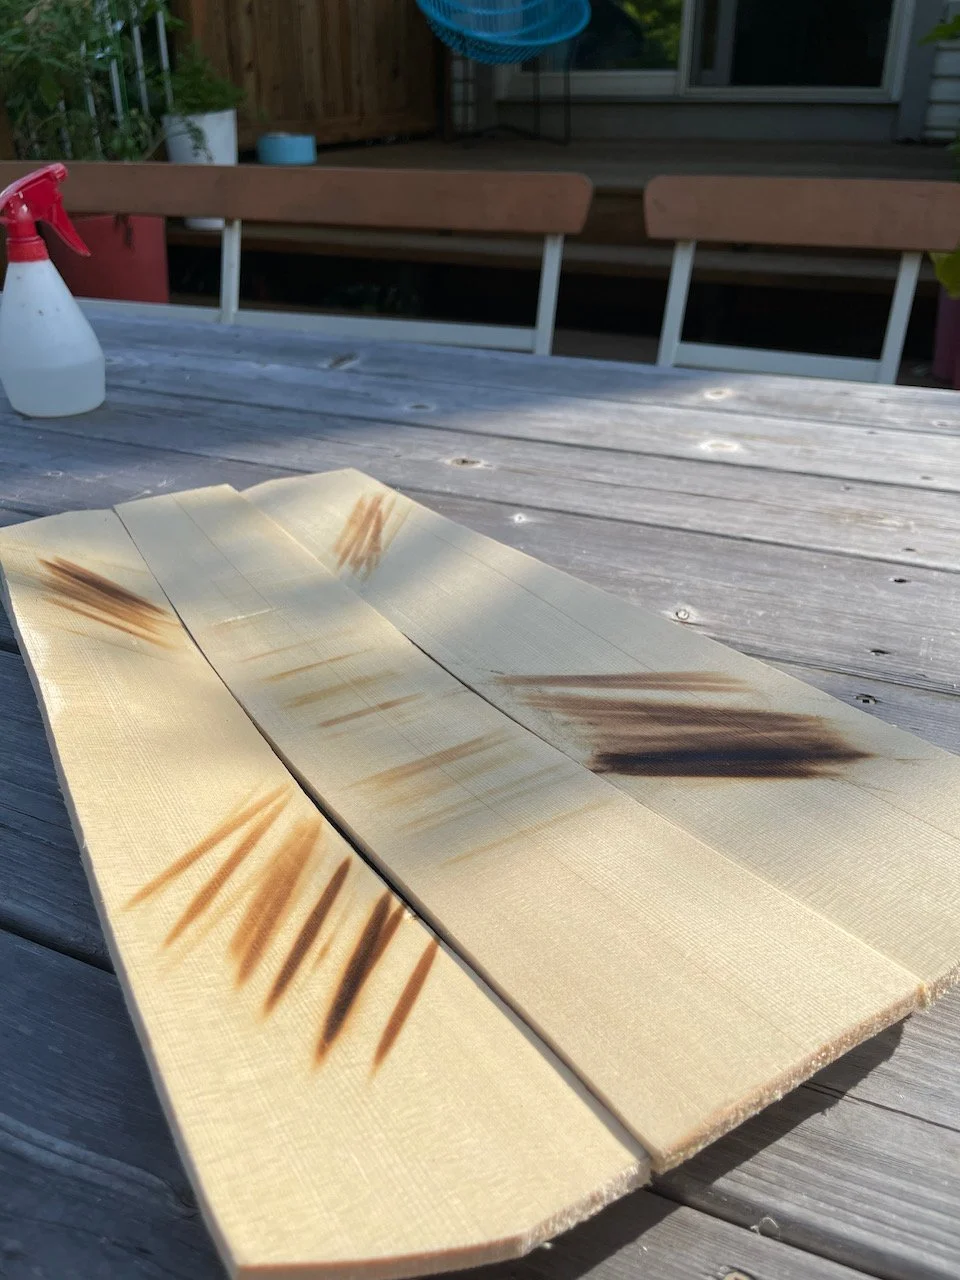
All that heat, especially on my simple small-diameter iron bending pipe, means there are burn marks. This is actually historically accurate- on original Elizabethan viols the same marks can sometimes be discerned. I’m going to plane them off though.
The next step is create a flat reference plane around the edges. This will be where the top joins the sides. A fun trick I learned is to clamp a jointer plane in the end vice. Essentially, the bottom of the plane becomes as big as your workbench!
It doesn’t take much- just enough so that the sides and linings will meet the top on this flat section.
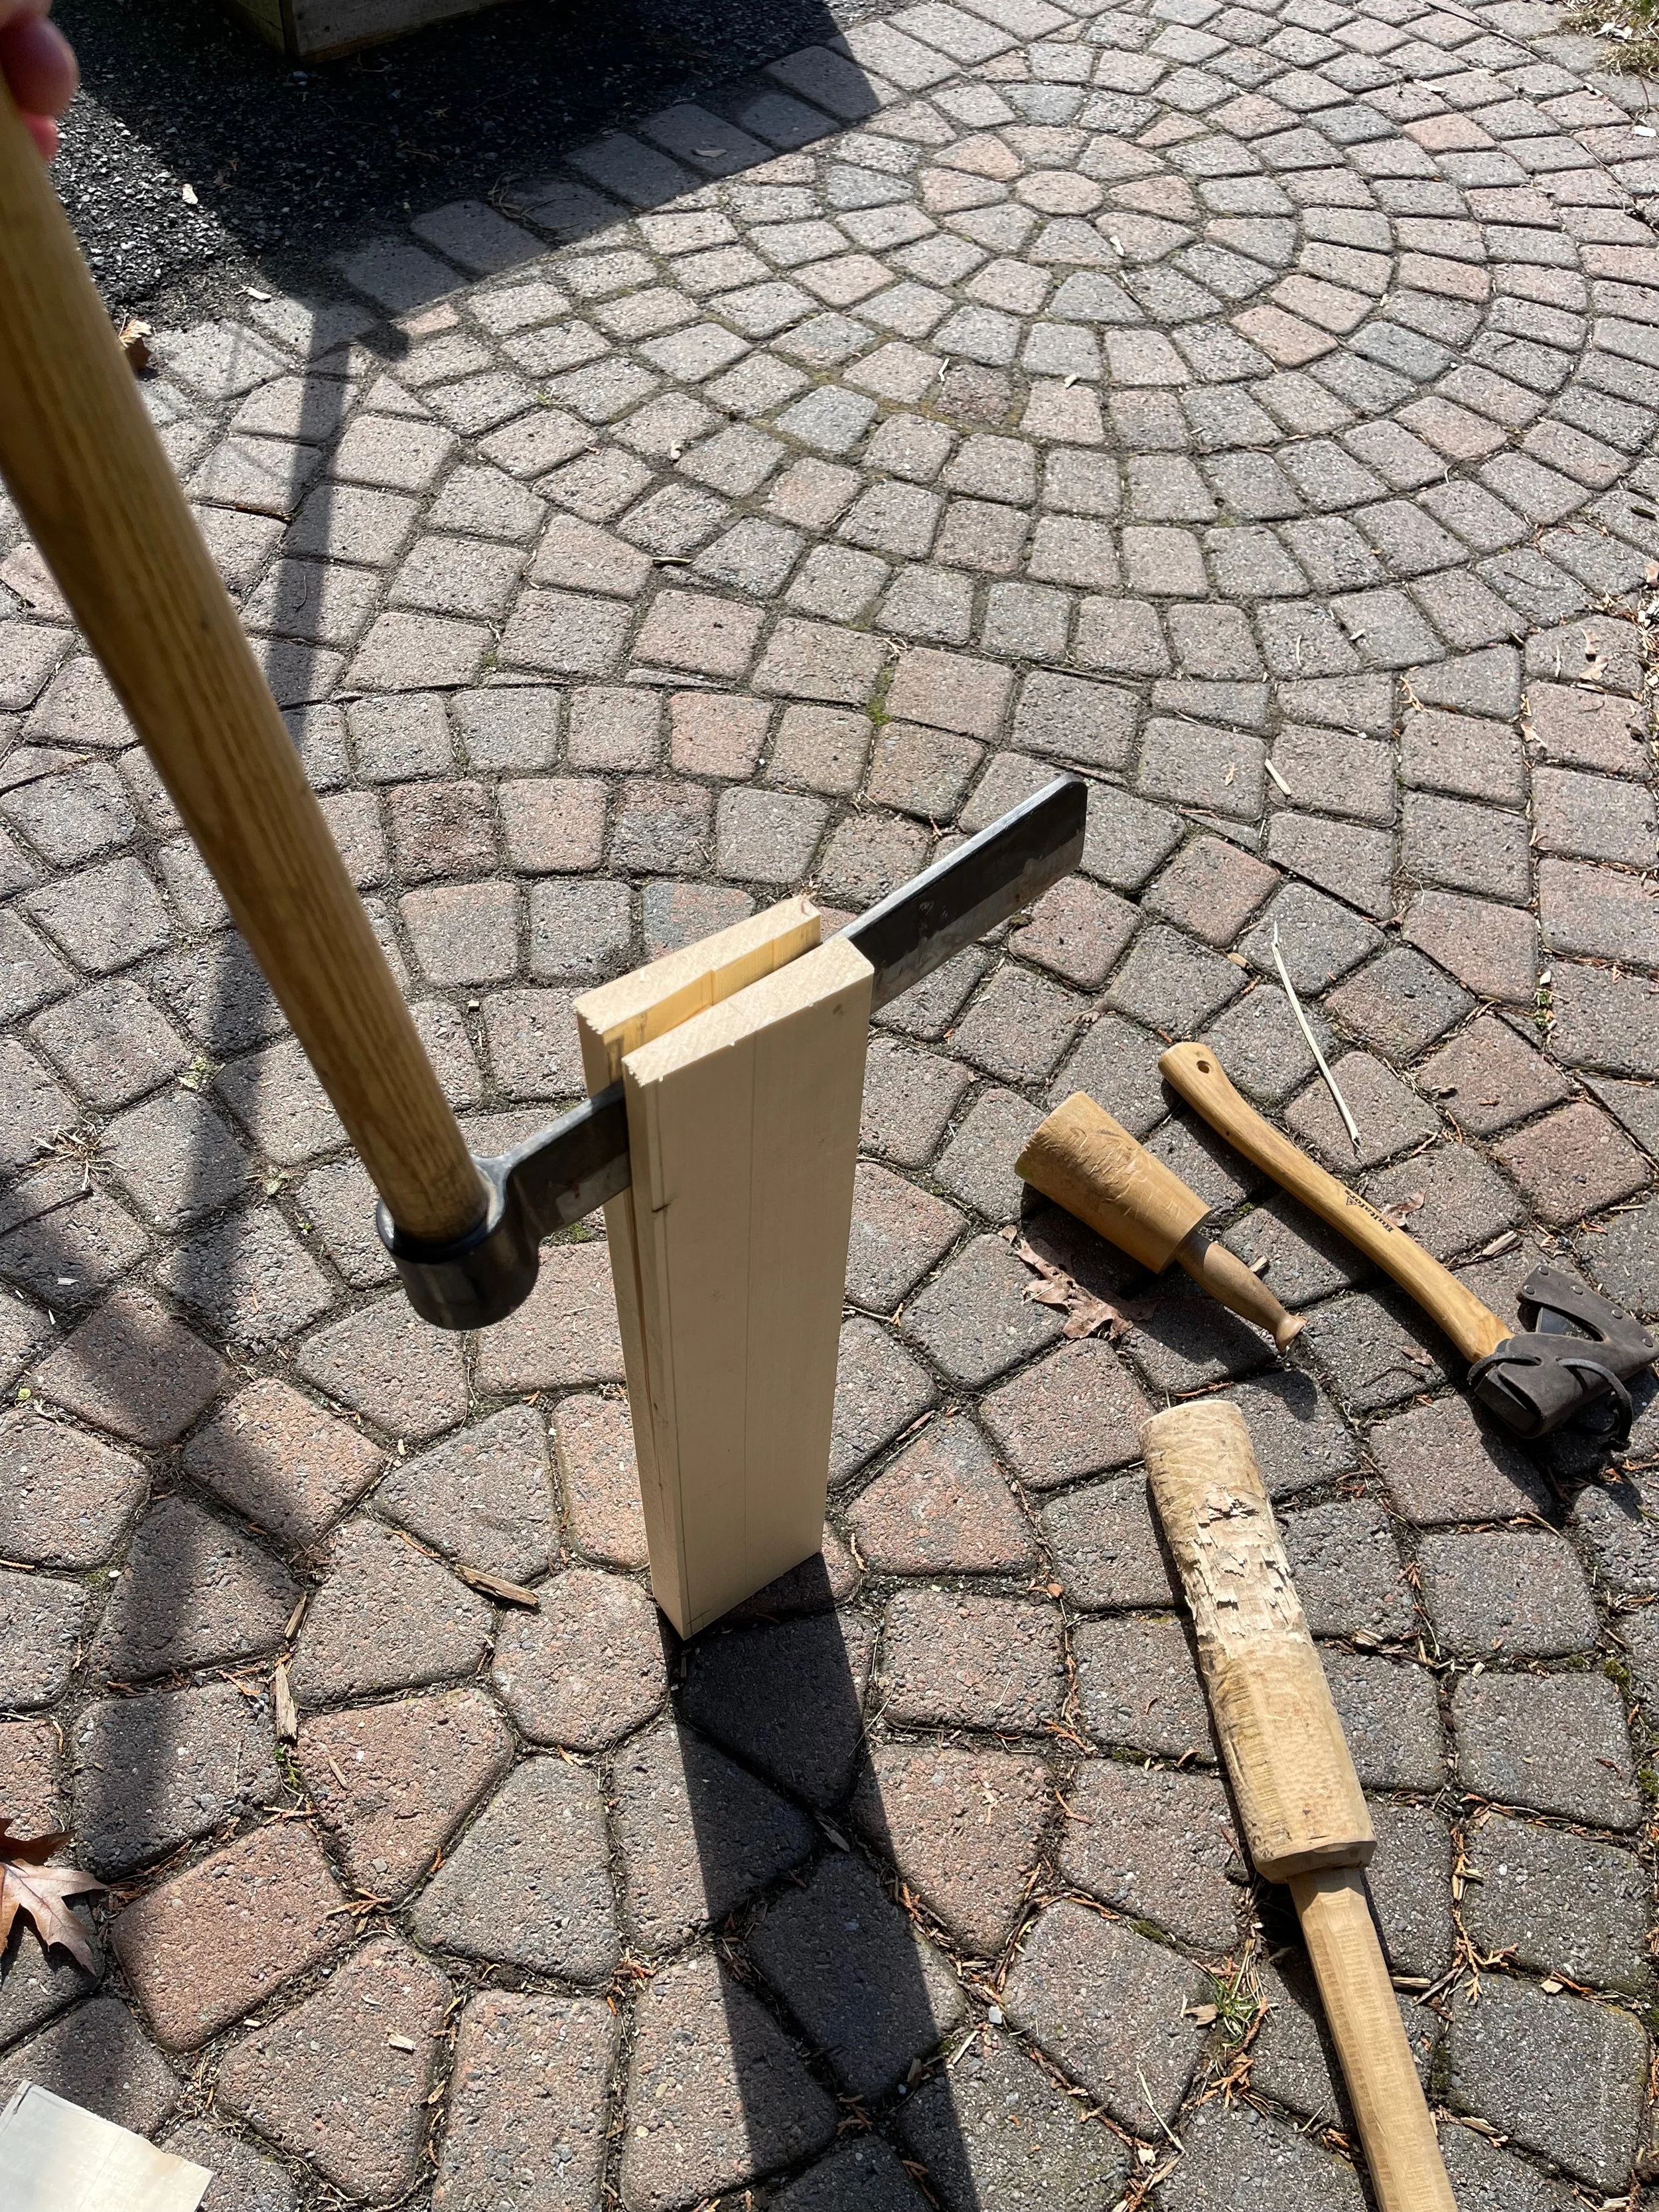
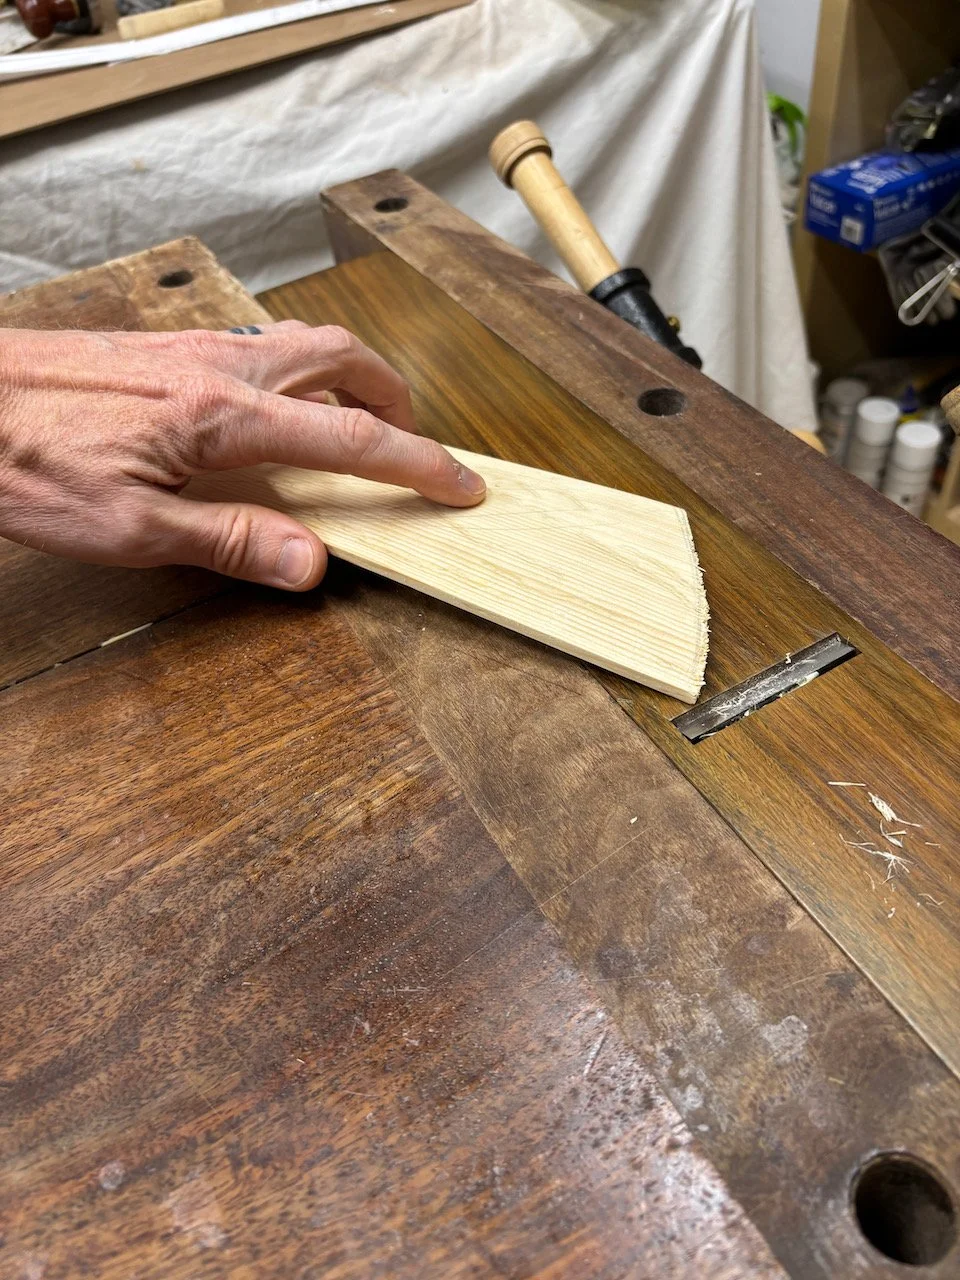
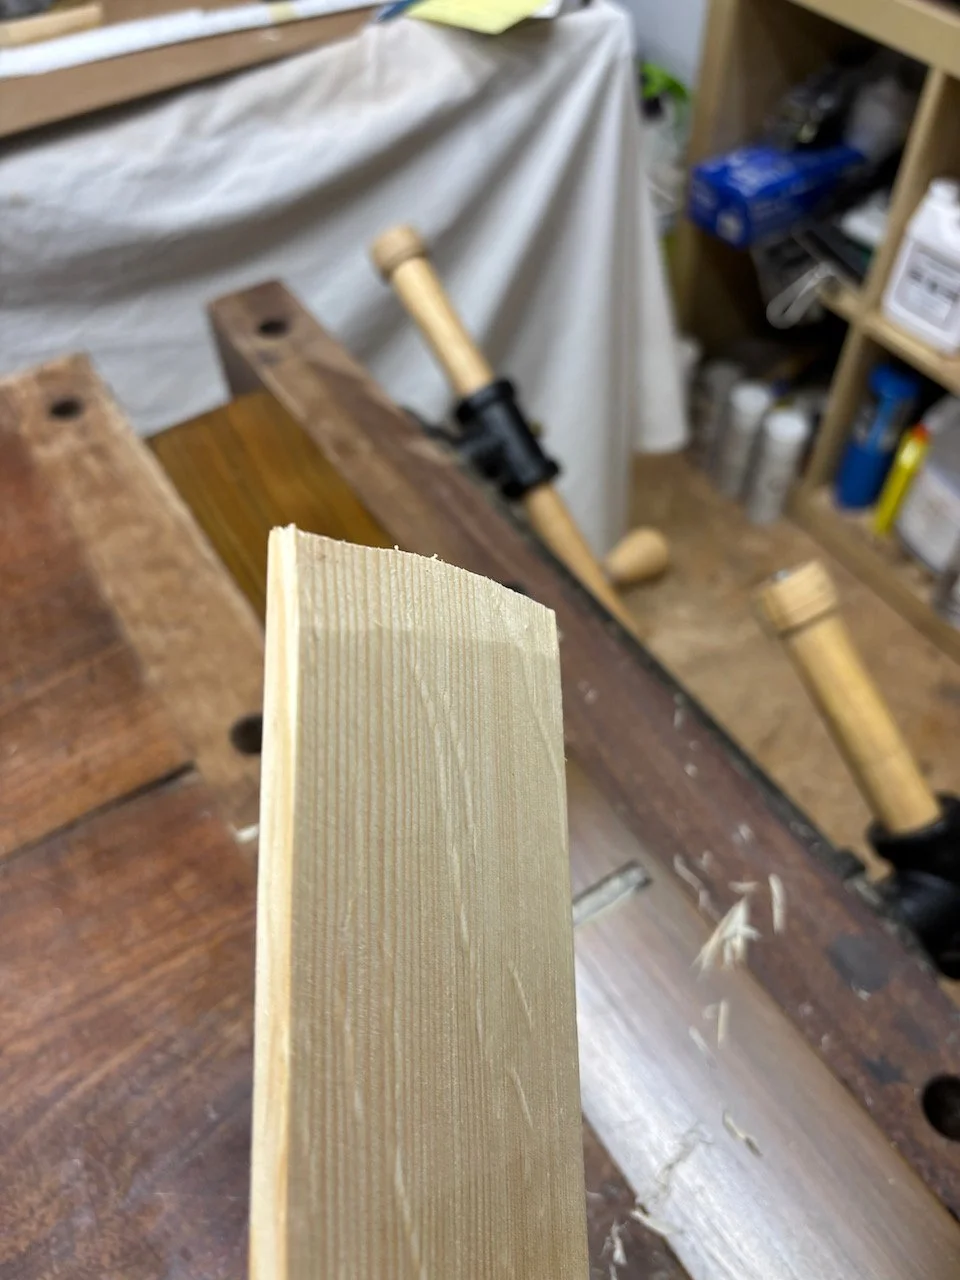
The joints of the soundboard are critical. Each stave is tapered (narrower at the neck end), and furthermore, the joint must be angled slightly, so that the pieces fit together like the stones of an arched bridge. That way downward pressure makes the joint fit even tighter. I made this shooting board with a ledge to hold the correct angle.
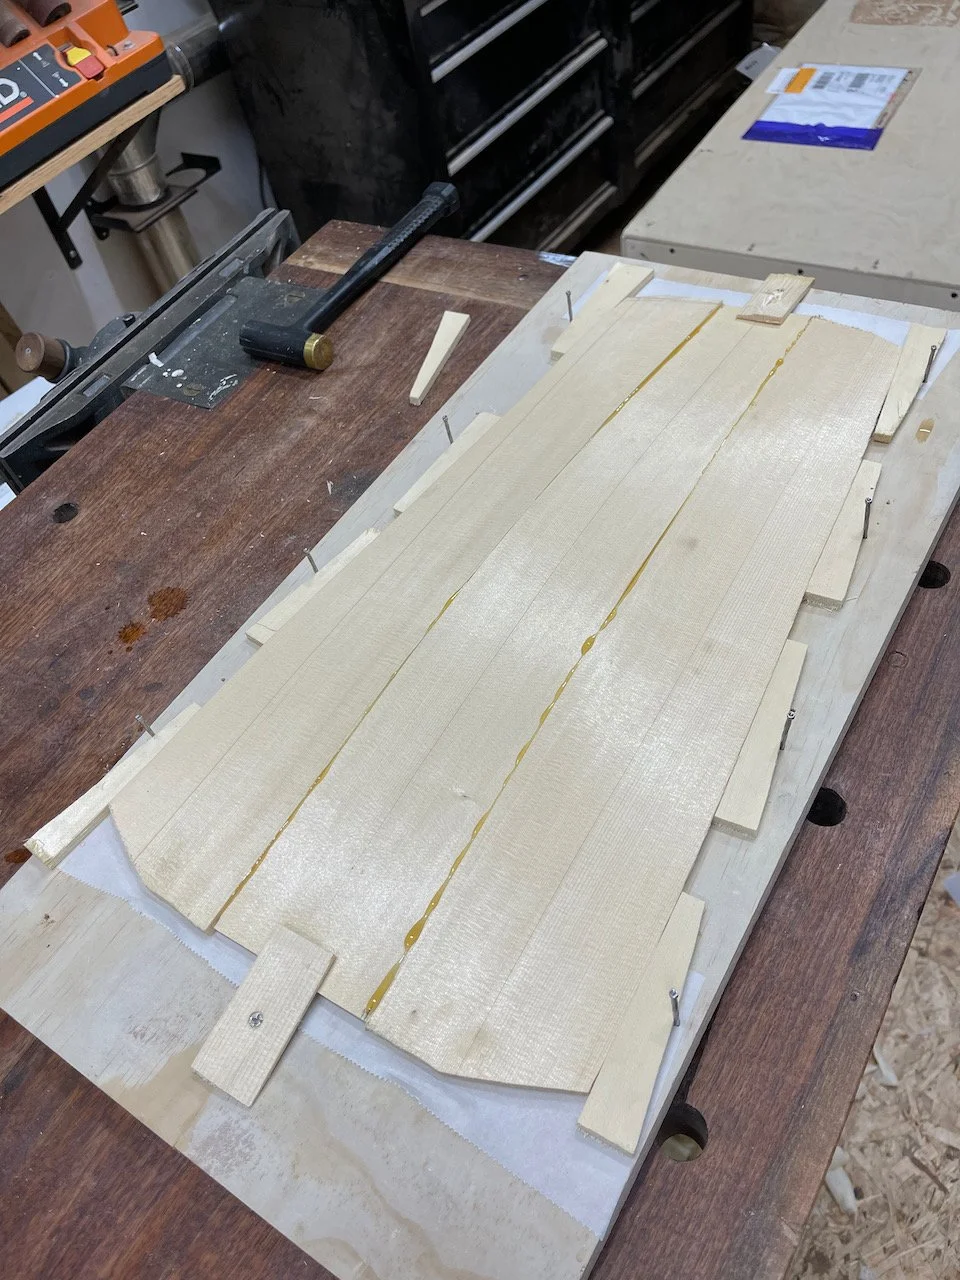
When the joints fit, it all comes together easily. Some nails and wooden wedges serve for clamping. With hot hide glue and well-fitted wood, very little pressure is required.
The wings for lower and upper bouts are added after. They’re just flat pieces, no arching involved. In retrospect, it probably would have been fine to glue up the entire soundboard in one go, but I decided to play it safe.
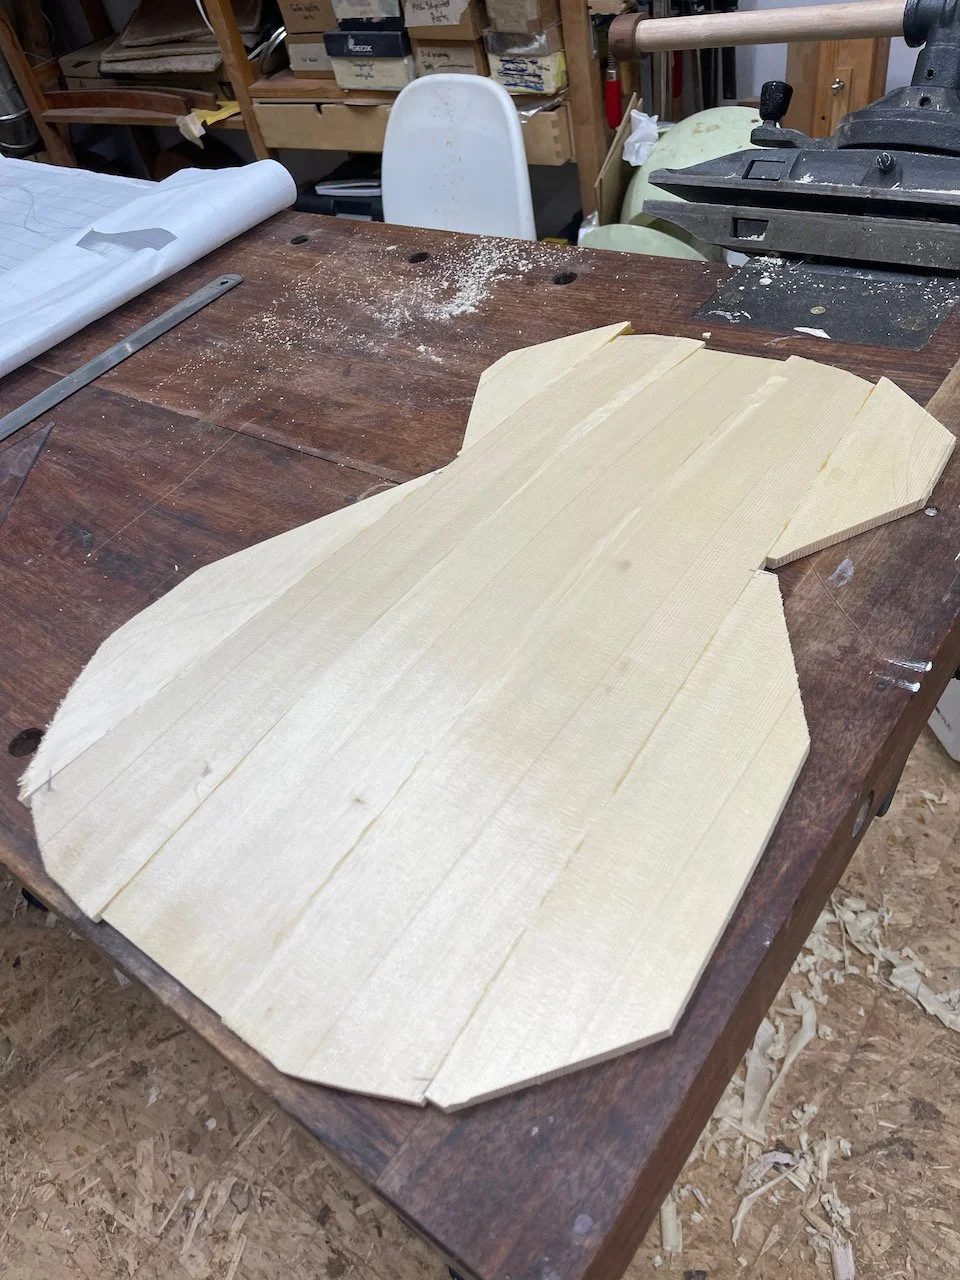
Carving the soundboard now is a simple matter of smoothing and shaping. There’s not much material to be removed, and in any case since the wood fibers are all perfectly parallel with the arch of the top, it’s extremely quick and easy. The lack of runout makes a huge difference.
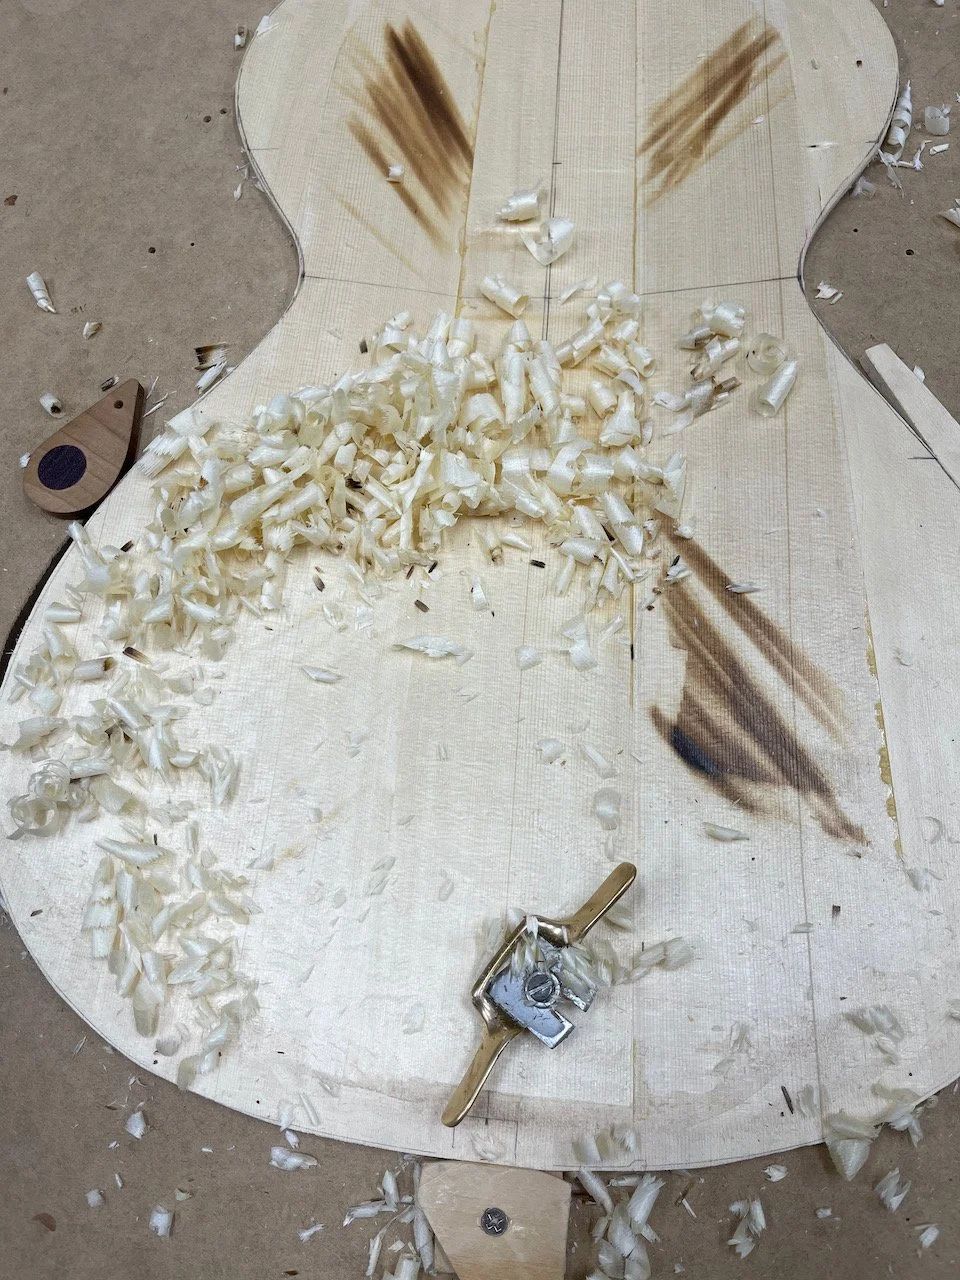
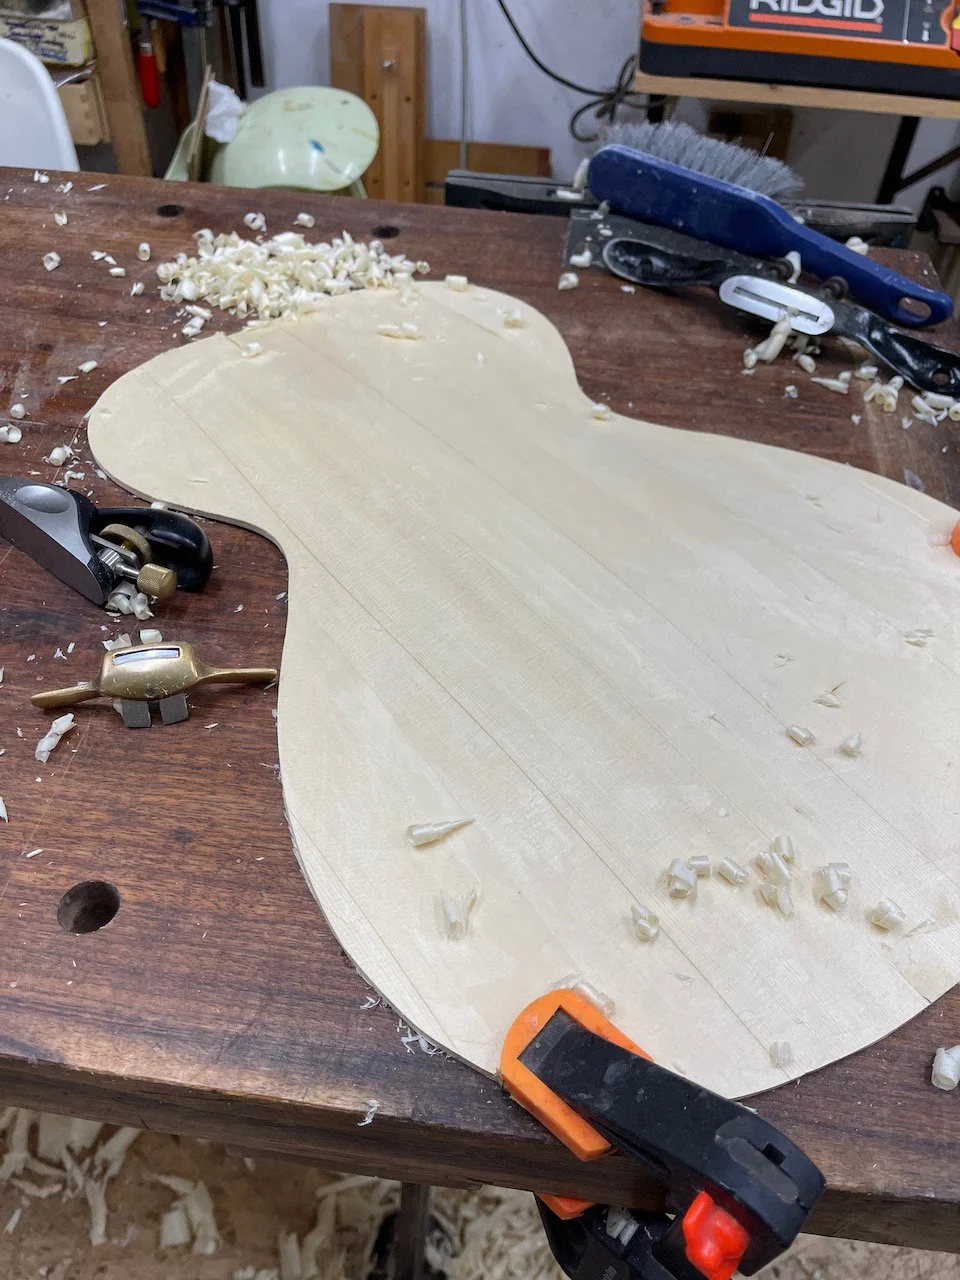
The interior takes a little more work, since this is where I am meeting with the final thickness. Don't want to go too far now and muck everything up. But again, it’s quick and satisfying work due to the lack of runout. And as you can see, those burn marks are actually very shallow- a couple of passes from my spokeshave and they’re gone.
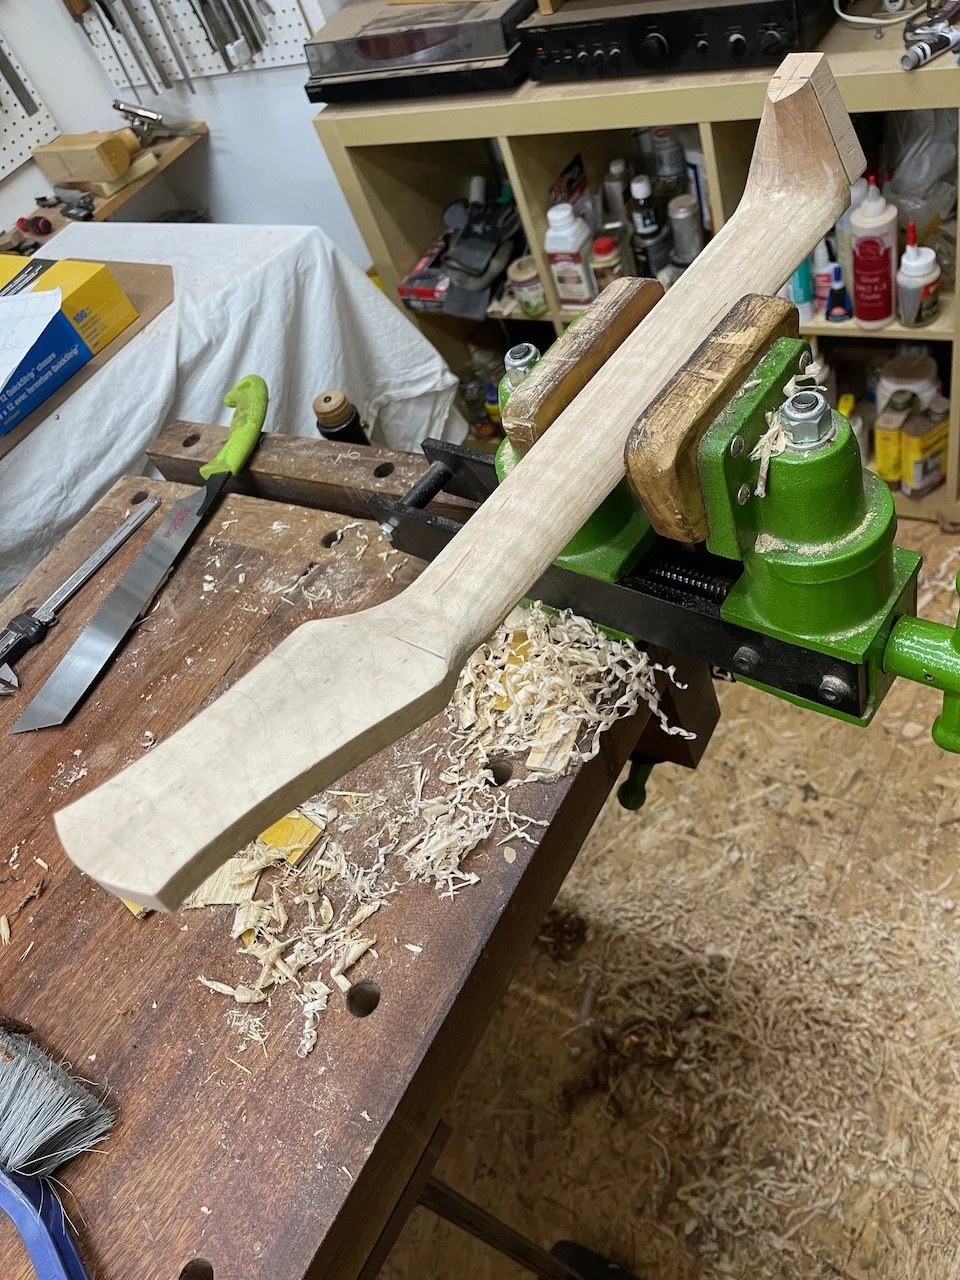
I made the decision early on the try and build “La Cremonese” using as many traditional techniques as possible. And not just for the soundboard: I challenged myself to avoid using power tools altogether. So this neck was carved from a wedge of Canadian soft maple using handsaw, hand plane, and knives. Note the “Spanish heel” neck attachment. This was not typically used on viol family instruments, but it seems appropriate for a nylon-string guitar. There is plenty of excess bridge height in case the action needs to be lowered, normally the achilles heel (haha) of the method when used on flat-top guitars.
The curly maple sides were planed by hand as well. The plane needs to be set up perfectly, and the blade extremely sharp, but when everything is working well it’s very satisfying. And the result is a beautiful surface with better chatoyance than sandpaper can acheive.
The sides are bent over a hot pipe. This one is heated by electricity to a thermostatically-controlled temperature, but in principle it’s no different from a charcoal-fired one (and much safer)
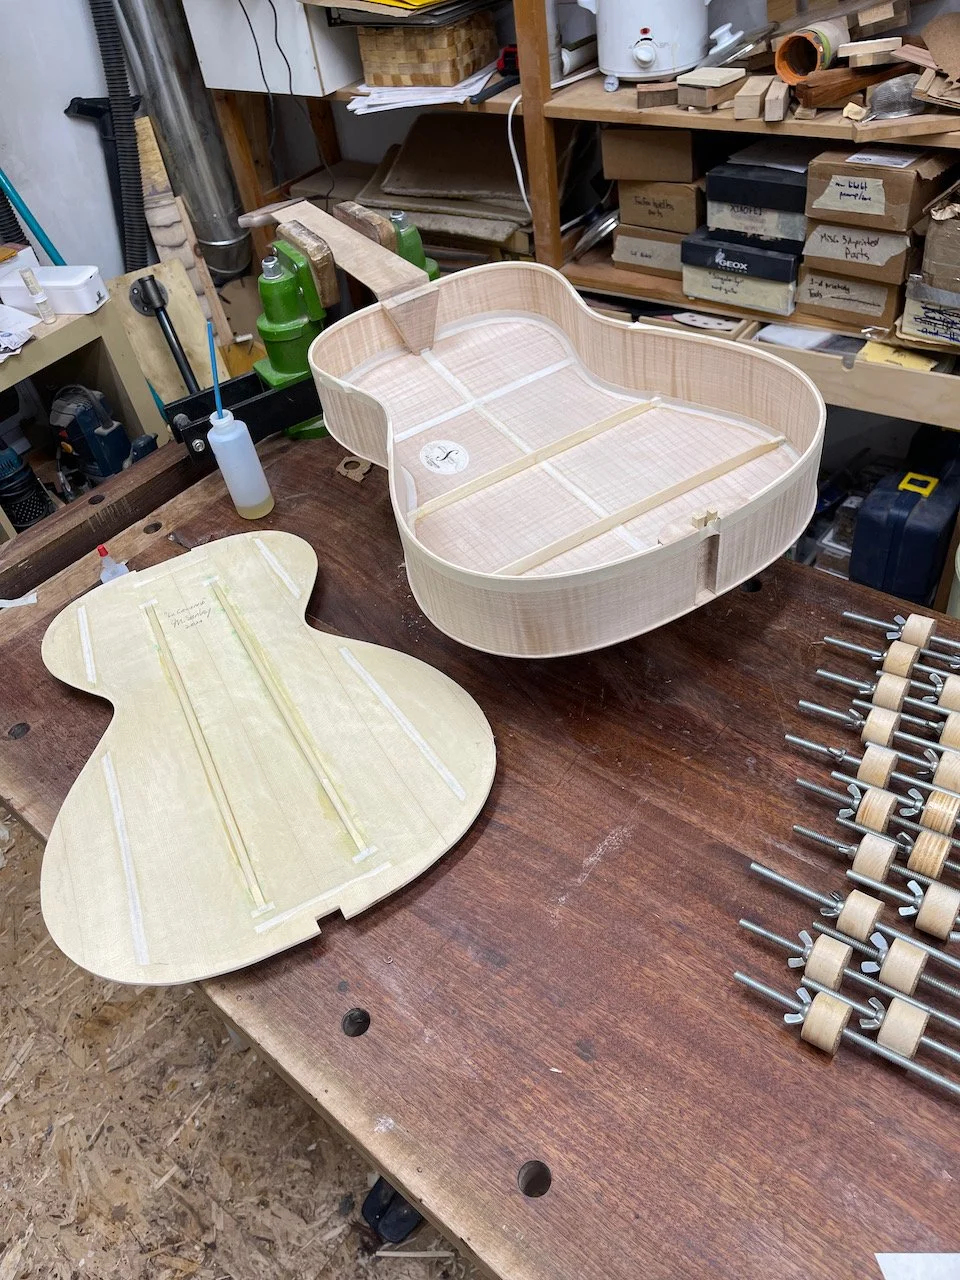
After gluing the back to the sides, some trimming is required. I decided to treat the corners with a violin-style overhang. On original viols the front and back were trimmed flush with the sides- but the overhang makes it much easier to remove and reglue the top or back at a later date, if it should be required.
Prior to assembly: I didn’t take nearly enough photos of how I got to this point, so I’ll point out what I can.
The central joints of the soundboard get conveniently reinforced by the two tone bars. All other joints are reinforced with strips on linen cloth. When hot hide glue is brushed on, it soaks in and creates a super strong composite material. This method has been used extensively and successfully since medieval times- as long as it doesn’t get soaked in water!
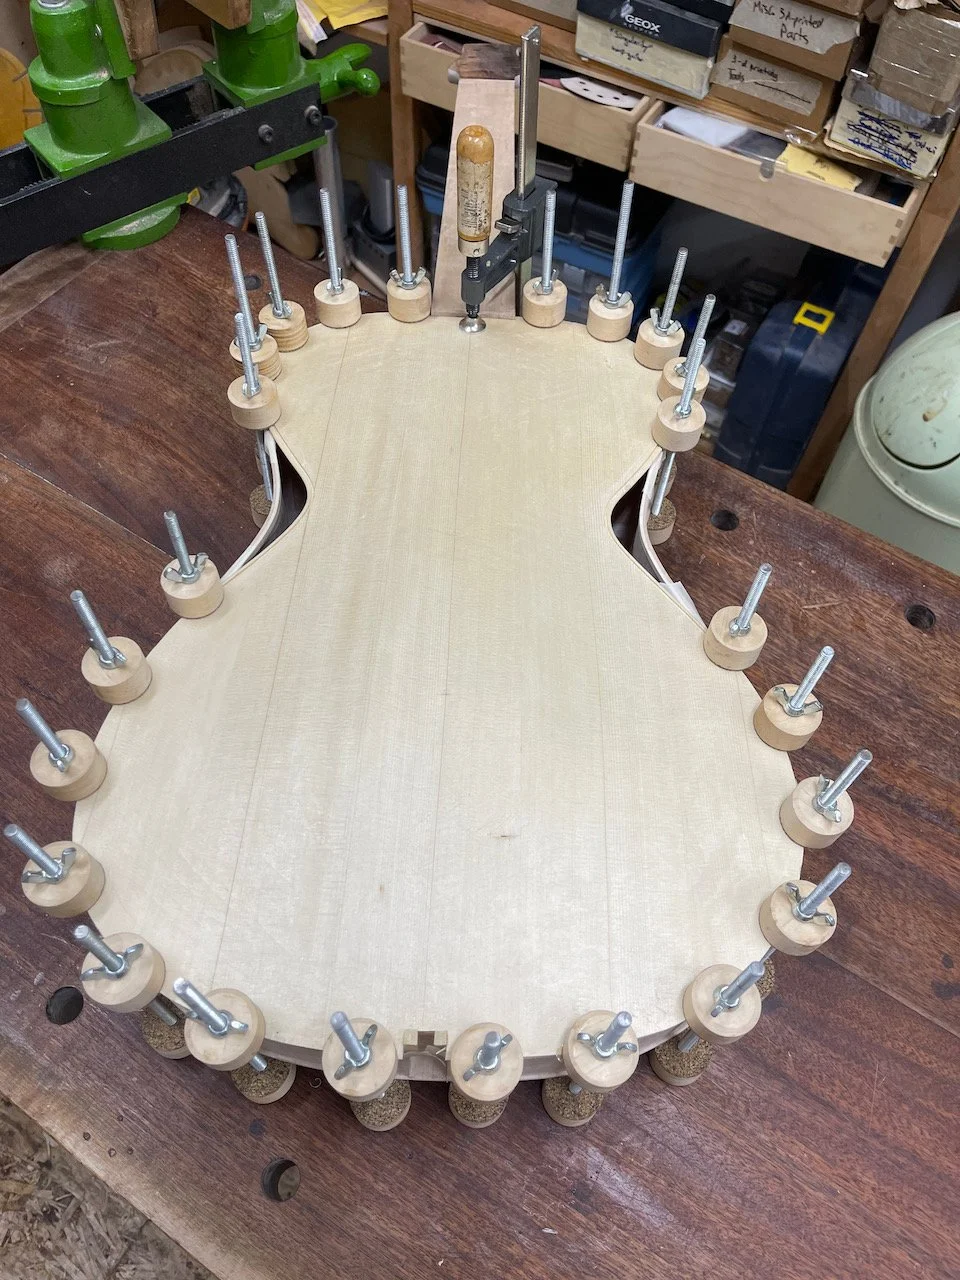
Putting it all together with spool clamps.
In keeping with the spirit of using traditional techniques, I also decided to forego sandpaper. One can achieve beautiful results with sharp blades and scrapers, but on curved surfaces it is hard to remove all of the facets and make them smooth. Any unevenness will be amplified when finish is applied. So I turned to another nearly-forgotten tactic: dried horsetails (Equisetum)!
This common plant grows quite abundantly in patches near my house. The stems contain silica, which makes them mildly abrasive. In practice they acted quite a bit like fine sandpaper, smoothing out the facets and evening out the surface texture without removing very much material; a sort of combination of cutting and burnishing. To my eyes the technique even seems to accentuate the medullary rays of the spruces in a lovely way.
The tailpiece is also modelled after the kind used on baroque viols. The post is carefully fitted and then glued into a mortice in the taioblock. String tension easily holds the tailpiece on with string tension. In fact, some baroque viols even had multiple notches, so you could choose how much down pressure to apply to the bridge.
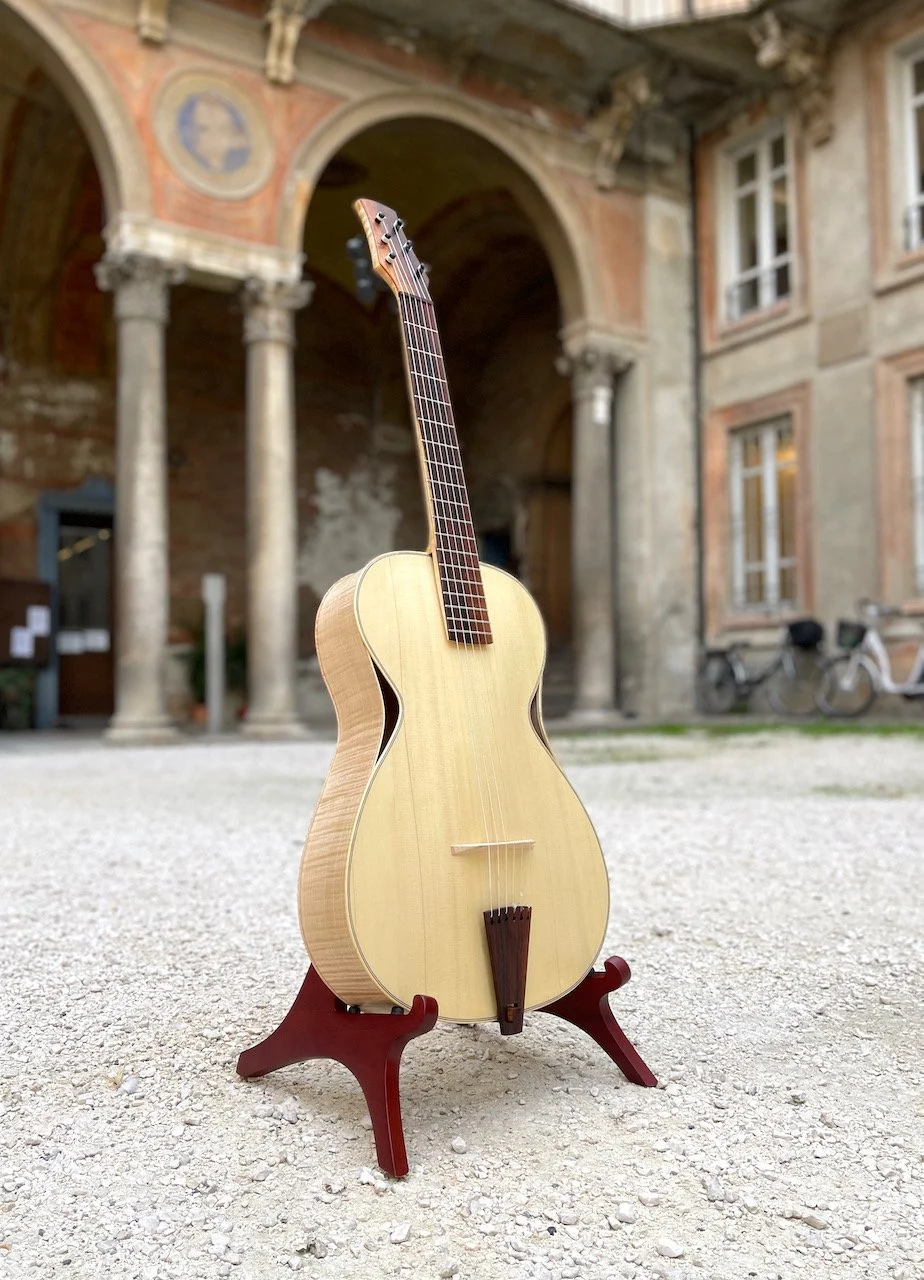
The completed article, in the courtyard of Palazzo Raimondi, Cremona, Italy.
I believe the result was worth the effort; in fact, the biggest surprise of the whole project was that it probably required less effort than a more typically constructed archtop instrument. I will certainly continue exploring this theme. The next step: a steel-string version!