
An improved adjustable-angle neck mechanism
Guitarists are notoriously fussy about string action. A typical player will feel out of sorts if the strings are even half a millimetre higher then they’re used to. Too high, and the strings have to be pressed further down to make contact with the frets, which makes it difficult to play quickly. Too low, and the strings will tend to buzz against the frets, which sounds (generally) bad.
In 1920, Ted McHugh at Gibson developed a system for archtop guitars and mandolins, whereby the bridge is balanced on threaded posts. This meant that minor adjustments were relatively easy to make. It became the industry standard, and millions of archtop instrument have been made with it. Here’s an example on one of my early ones:
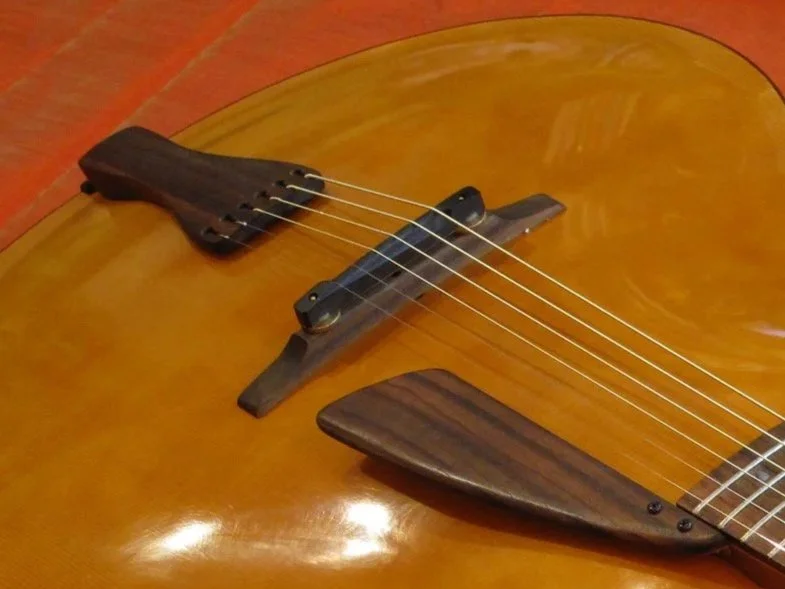
There is one important drawback though: this type of bridge is inherently less strong than it would be if it were a single piece. Some string energy is dissipated through flexing of the components. Furthermore, the parts need to fit together with a certain amount of clearance so they don’t bind. The net effect is that it is not the most efficient and sonically transparent way to couple a string with the resonating body of the instrument. So it works, but I can’t help wondering if I could invent a better solution.
On most flat-top acoustic guitars, the string height can be adjusted by altering the bone saddle on the bridge. Remove it and file it down a little for lower action, make a new, higher one to raise it. This works well sonically, but it’s not typically something the player would do themselves, necessitating a trip to a luthier to correct the problem. Worse, it only works within a very narrow range of adjustment; when instruments start to bend out of shape with age, a neck reset is often called for. That’s a big job- and often spells doom if the cost of the work exceeds the value of the guitar.
One brilliant luthier came up with a solution: Johann Stauffer, of Vienna, invented a mechanism that adjusted the angle of the entire neck. The neck heel would fit into a mortice, and a machine screw went through it and into a nut embedded in the neck block. By tightening the screw with a clock-key, the neck would rotate down, thus quickly reducing the action.
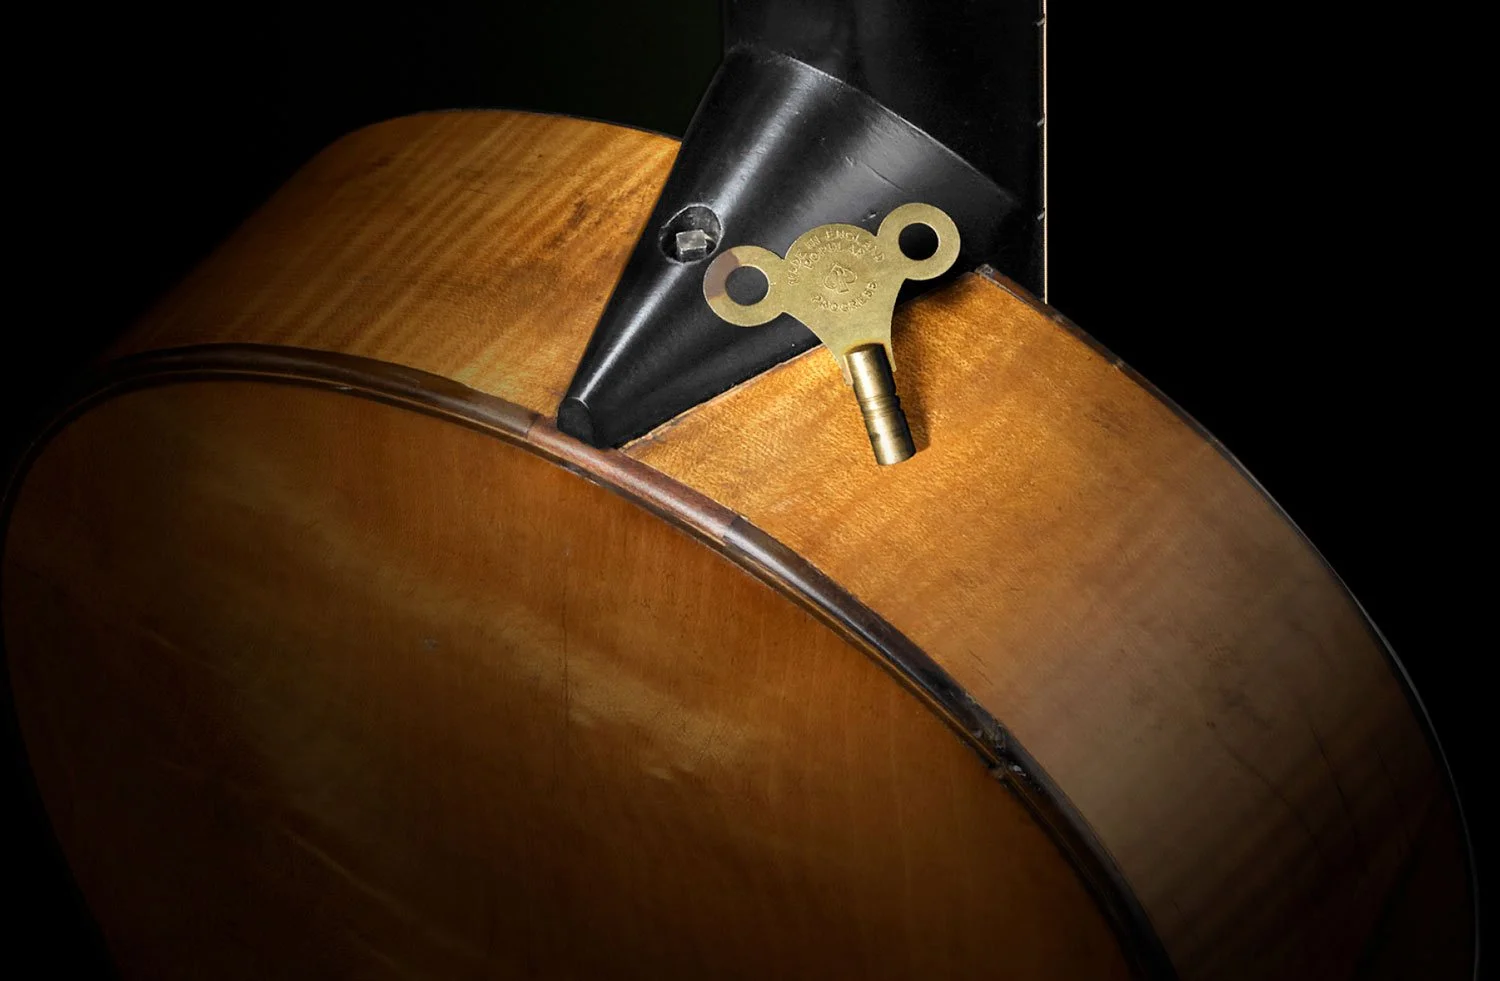
photo by “The Cambridge Consortium for Guitar Research”
The fingerboard extension, normally glued to the soundboard, now had to be raised above it, but no matter. The system was so quick and effective it could even be adjusted between songs, and as a bonus, the neck could be removed entirely.
To my eyes though, the best application of the Stauffer-type adjustable neck would have been for archtop guitars: they are commonly (and correctly) made with a floating fingerboard extension anyway, and don’t typically have a replaceable bone saddle. That’s the really “killer app” of adjustable necks. And I love to make archtop guitars!
But back to history: One of Stauffers compatriots, a certain C.F. Martin, took the adjustable neck invention to America, where the guitar eventually became the cultural phenomenon we know today. But somehow it never took off there, and was soon dropped from his offerings.
Oddly enough, the one place where Stauffers invention really took root was in Russia, and later the Soviet empire. Factories churned out millions of guitars with the same mechanism. I picked one of these up from a street market in Ukraine a couple of decades ago, and found that it even used the same size of clock-key:
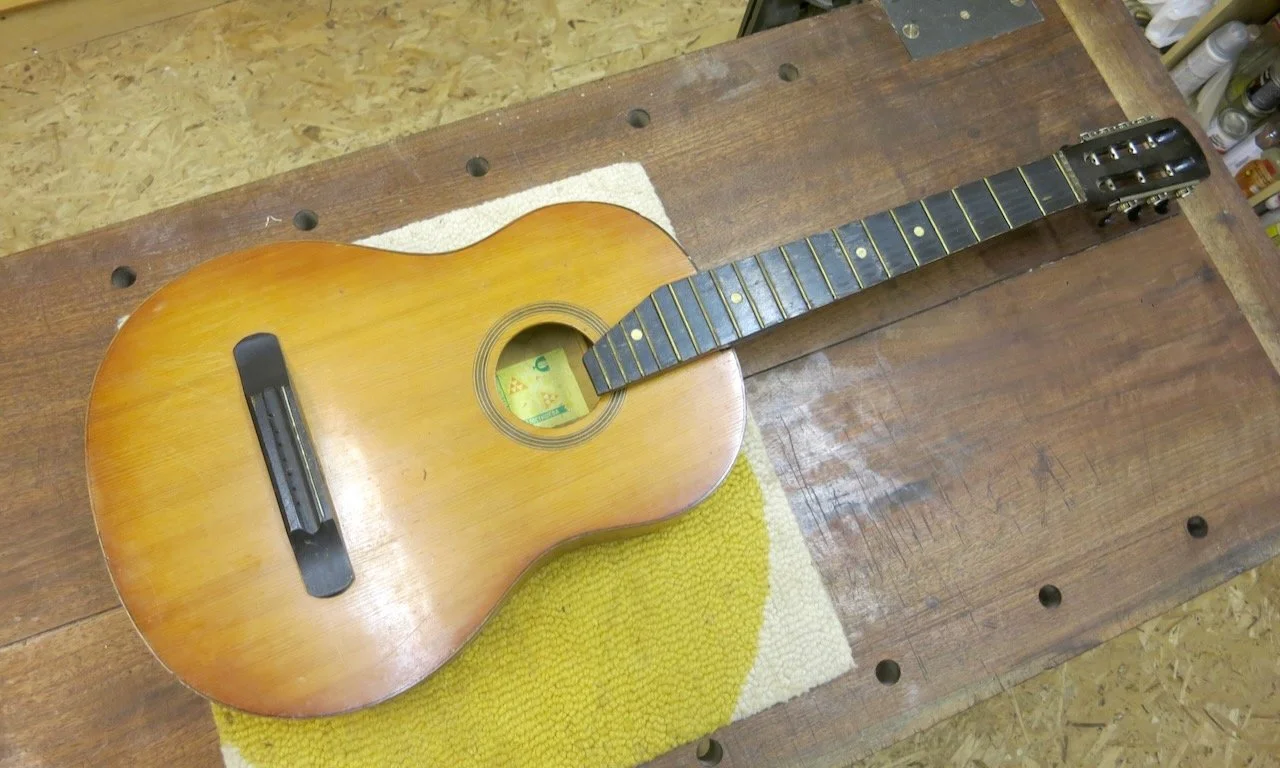
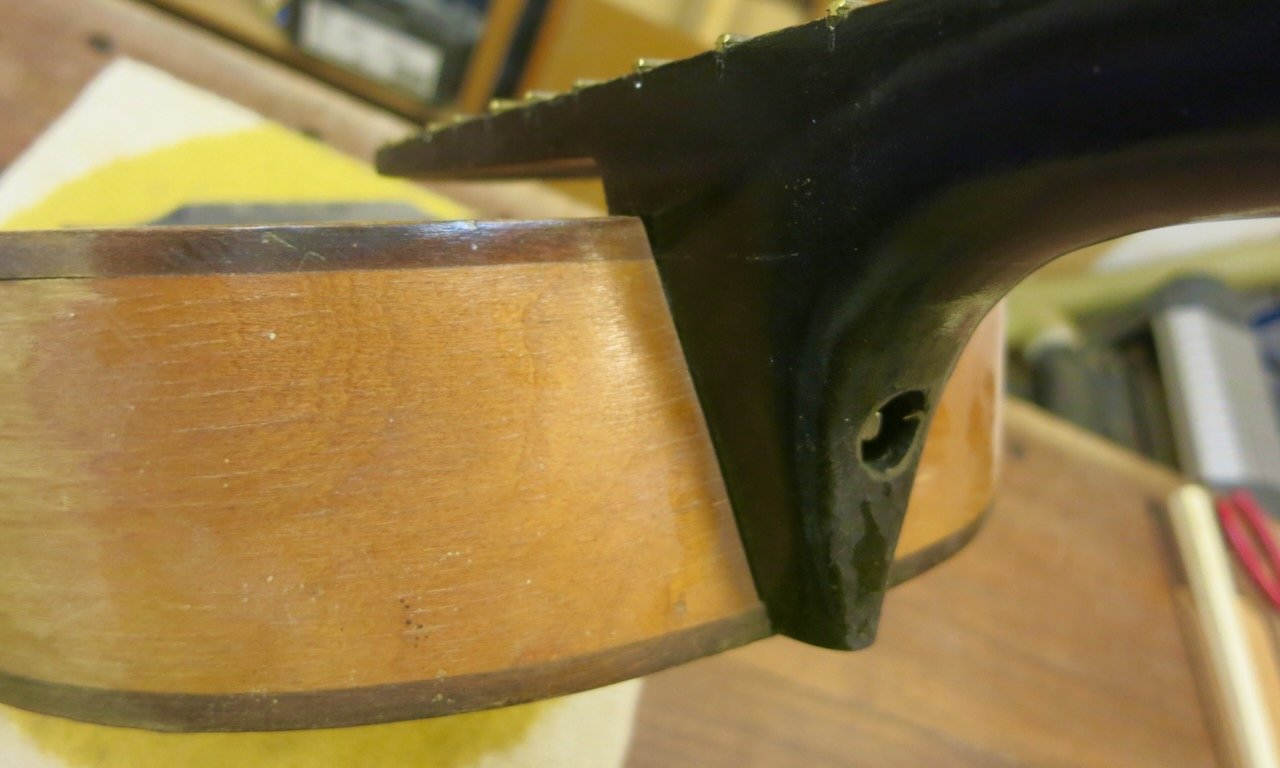
There was a lot of room for improvement. This was not a high-quality instrument, so the interface between neck and body was out of square and not even close to flat. Loosening the screw resulted in the neck not only rotating forward, but also sliding up in its v-shaped mortice. Strings did not stay aligned with the edges of the fingerboard, or anything else for that matter. I conceived a solution- a notch in the neck, and a matching bone bearing-plate in the mortice:
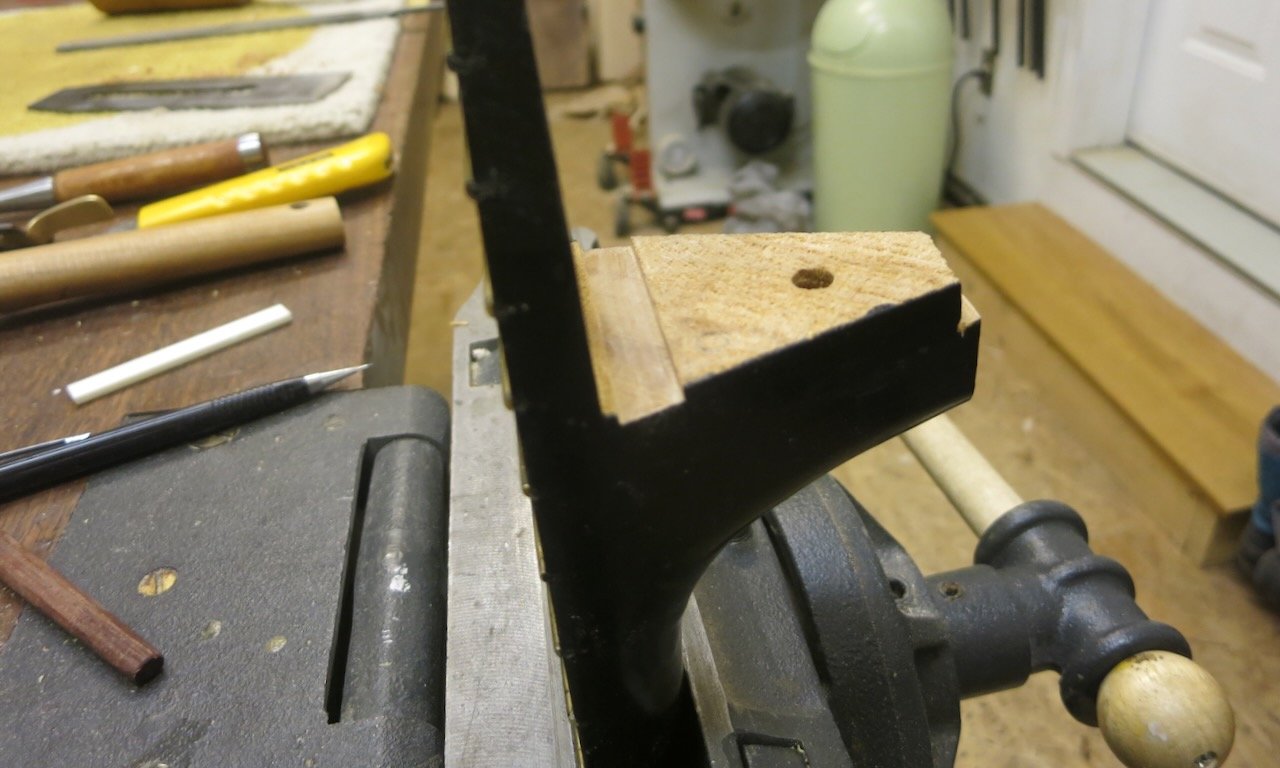
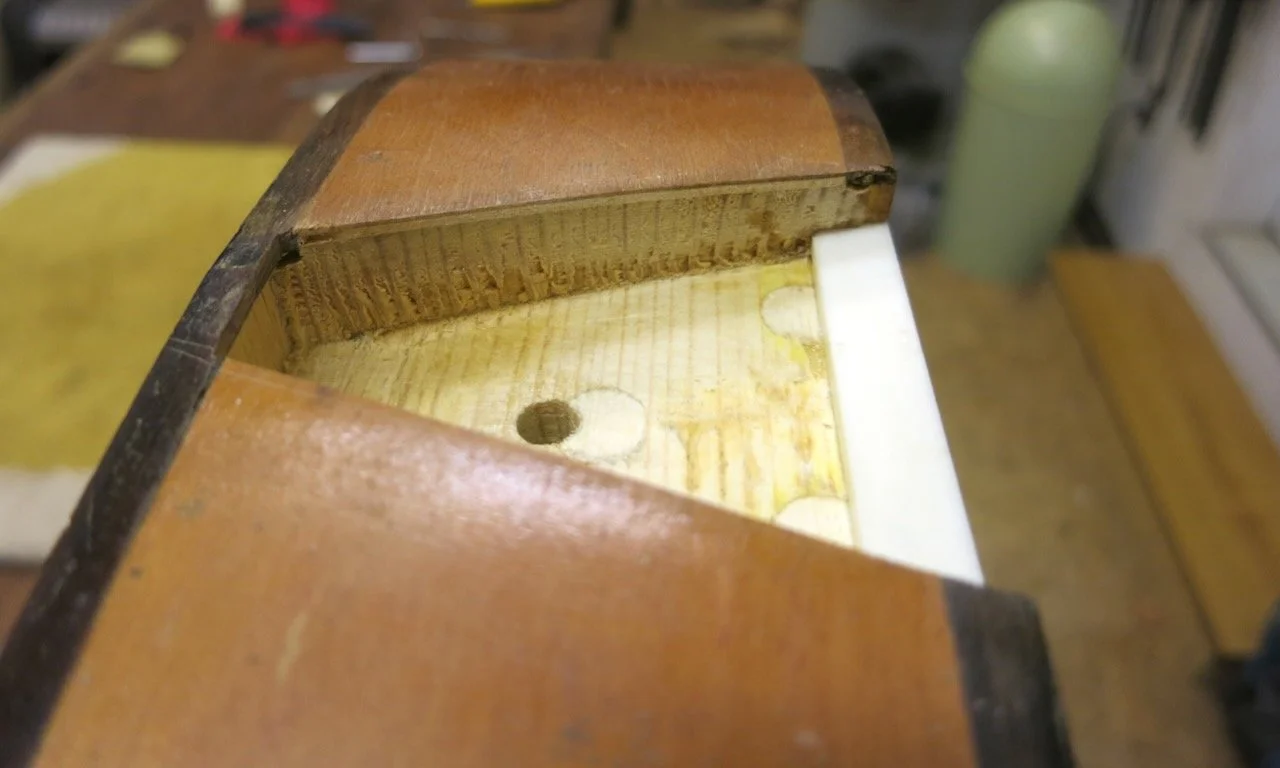
Now it functioned properly; probably better than it ever had, in fact.
But there are still a couple of aspects that are not optimal. The first is that, since the screw head is not captive, the neck can be pulled backwards, varying the pitch of the strings like a whammy bar. In practice that’s pretty easy to work around- simply don’t pull back too hard on the neck. But the other issue is that fine adjustments are nearly impossible; assuming screws with 20 threads per inch, one turn of the adjustment screw would pivot the heel forward by 1/20 of an inch; the neck, being much longer, gets leveraged dramatically: one turn of the screw changes the action by about 1/4 of an inch, which would render the guitar totally unplayable. So any neck angle adjustments require small fractional turns.
Again, not a big problem on this particular instrument; Nylon strings are more forgiving of high action, and this dodgy guitar it is hardly a great platform for precise, nuanced playing, so “close enough” is definitely close enough. But if I’m to build a really high-quality steel-strung guitar meant for discerning musicians, I’m going to want to improve both of those idiosyncrasies.
I know of a few other luthiers who have made improvements to the basic Stauffer Mechanism. Greg Smallman placed the adjustment bolt on the front of the fingerboard, using a more substantial bearing-plate to act as the hinge. Mike Doolin proposed a captive bolt head, fixing the pulling-back problem. Jeremy Clark of 52 Instruments uses a counter-scew to lock the neck into position once the neck has been correctly adjusted. All of these are useful solutions to one of the drawbacks of the Stauffer mechanism.
But the other, of the coarseness of adjustment, remains. The simplest-seeming solution would be to use very fine threads on the adjustment bolt. but superfine threads are far more easily damaged, not to mention that they would have to be custom-made- and I don’t have a machine shop.
I spent a long time thinking about the best way to solve this; the better part of ten years, in fact. Finally a solution presented itself: differential threading!

Animation of differential screw courtesy Wikipedia.org
A differential screw is one that has finer threads on one side and coarser ones on the other. As it is turned, one half advances faster than the other half. Thus, the effective speed is equal to the difference between thread pitches. So if one half has a 0.5mm thread pitch, and the other half has o.7mm pitch, the net effect is like having a screw with super fine 0.2mm threads, only much stronger.
The other neat bonus is that since both ends of the screw are threaded onto something, it’s held captive- no more whammy-bar neck effect!
I incorporated the mechanism into my archtop guitar “Mignonette”. By using a 1/4-20 and 1/4-28 threads, I achieve an effective thread pitch of about 0.014 inches, or 0.36 mm! The adjustment screw is about 36mm from the pivot, but the nut is about 360mm away; therefore it is leveraged at 10:1. But the bridge stays stationary, and the pivot is near the halfway point between bridge and nut, so we can divide our leverage in two: 5:1. Add it all up, and the result is that a 1/4 turn of the adjustment screw has a net effect on the action at the 12th fret of about 0.5mm. Perfect! Here it is in action:
The neck heel has a brass insert inserted from the inside, to keep a clean look on the outside. I wasn’t able to find the perfect screw, so I had to modify an existing one that had a hex key slot on the end. It has 1/4-28 threads on the neck heel side, and 1/4-20 threads on the neck block side:
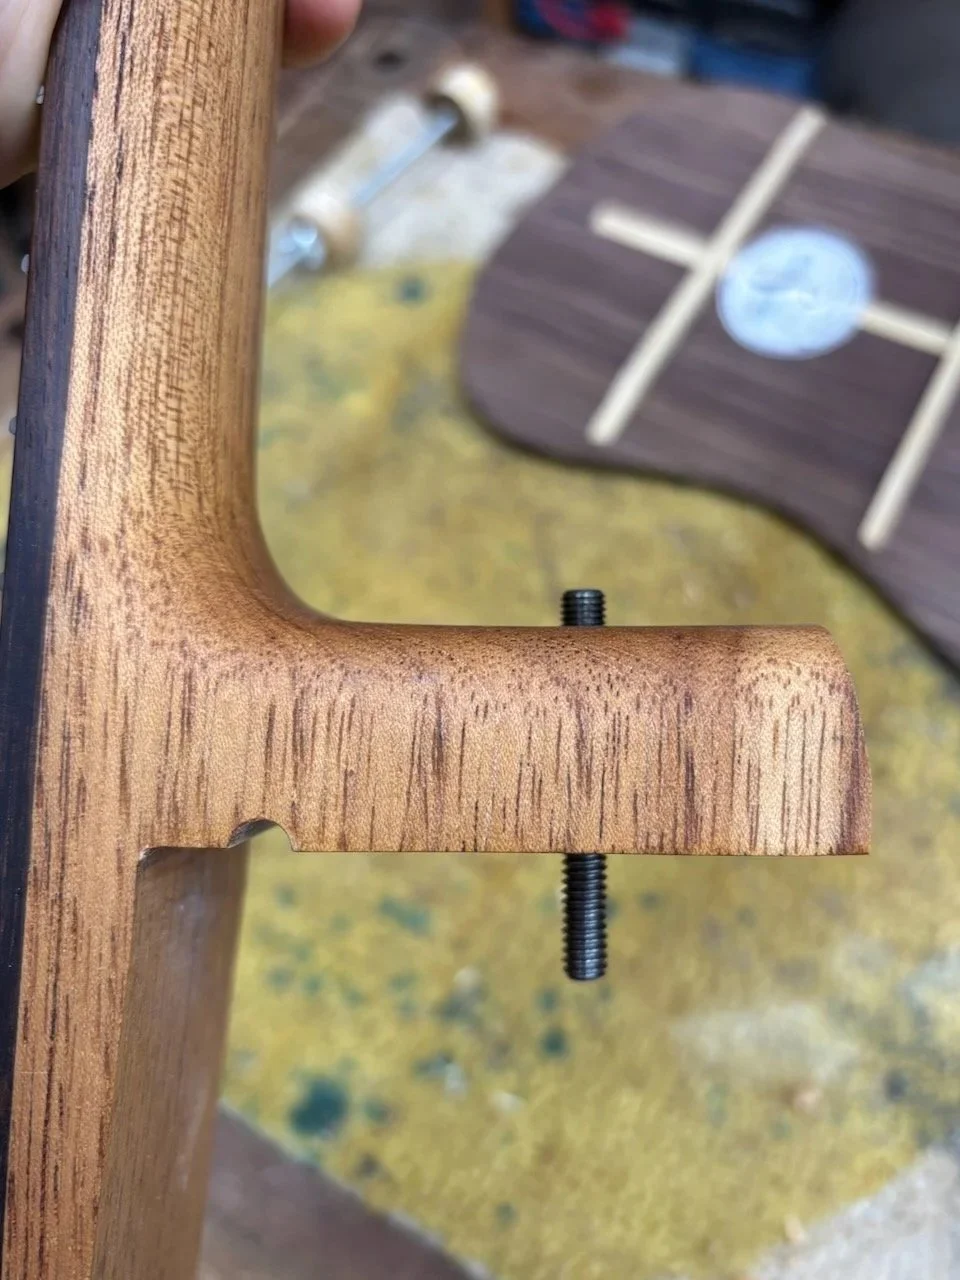
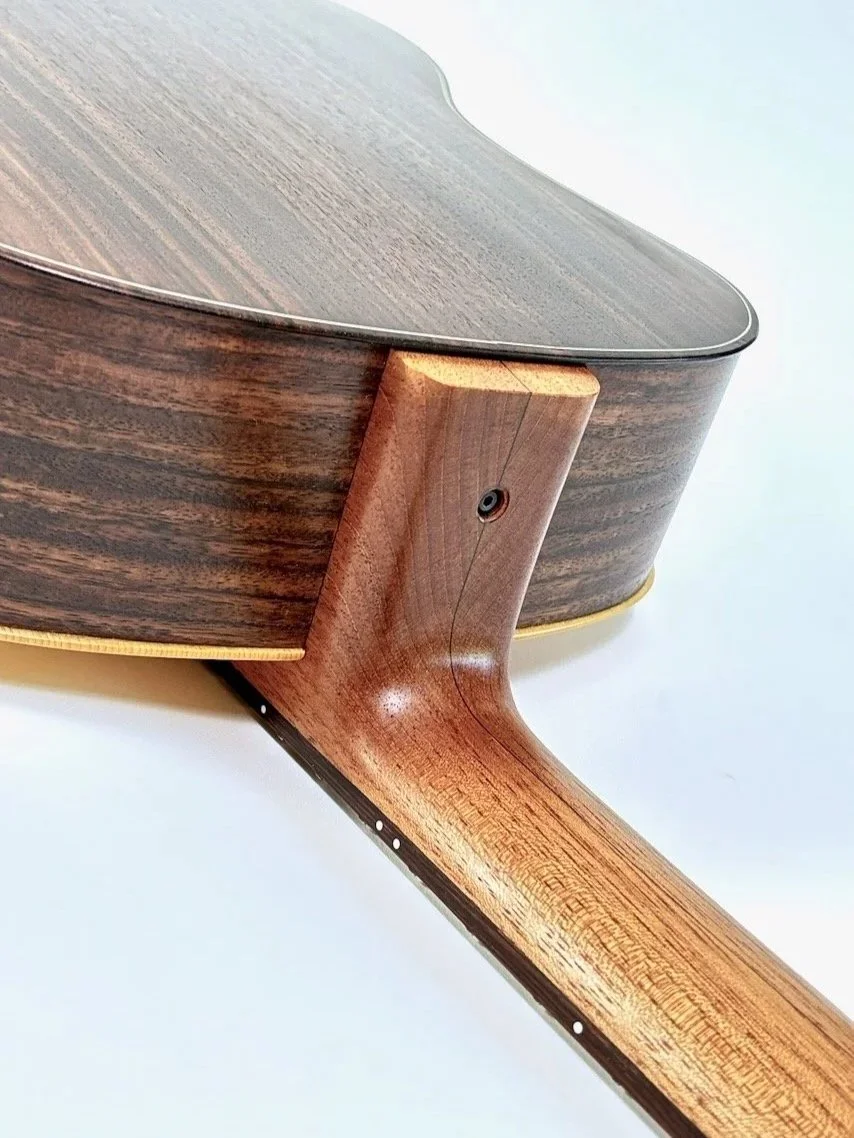
On the block, I used a polished 6mm steel rod to act as the pivot point. It interfaces with a half-round channel cut into the neck. For the 1/4-20 threaded insert, I drilled and tapped a steel bar, and screwed it in from the inside of the box. This way I was able to get both nuts aligned perfectly, which is essential to make the system work properly.
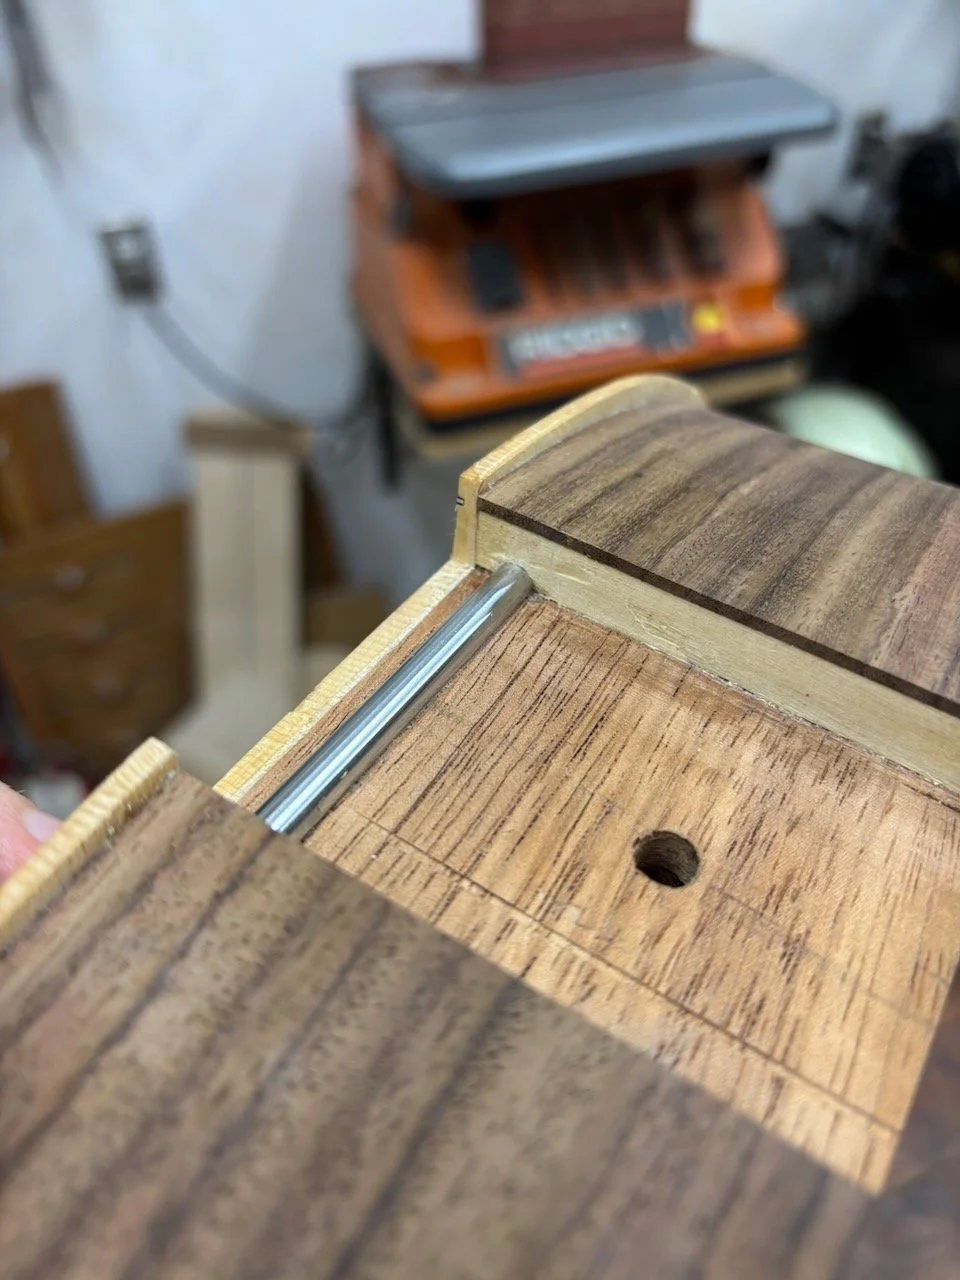
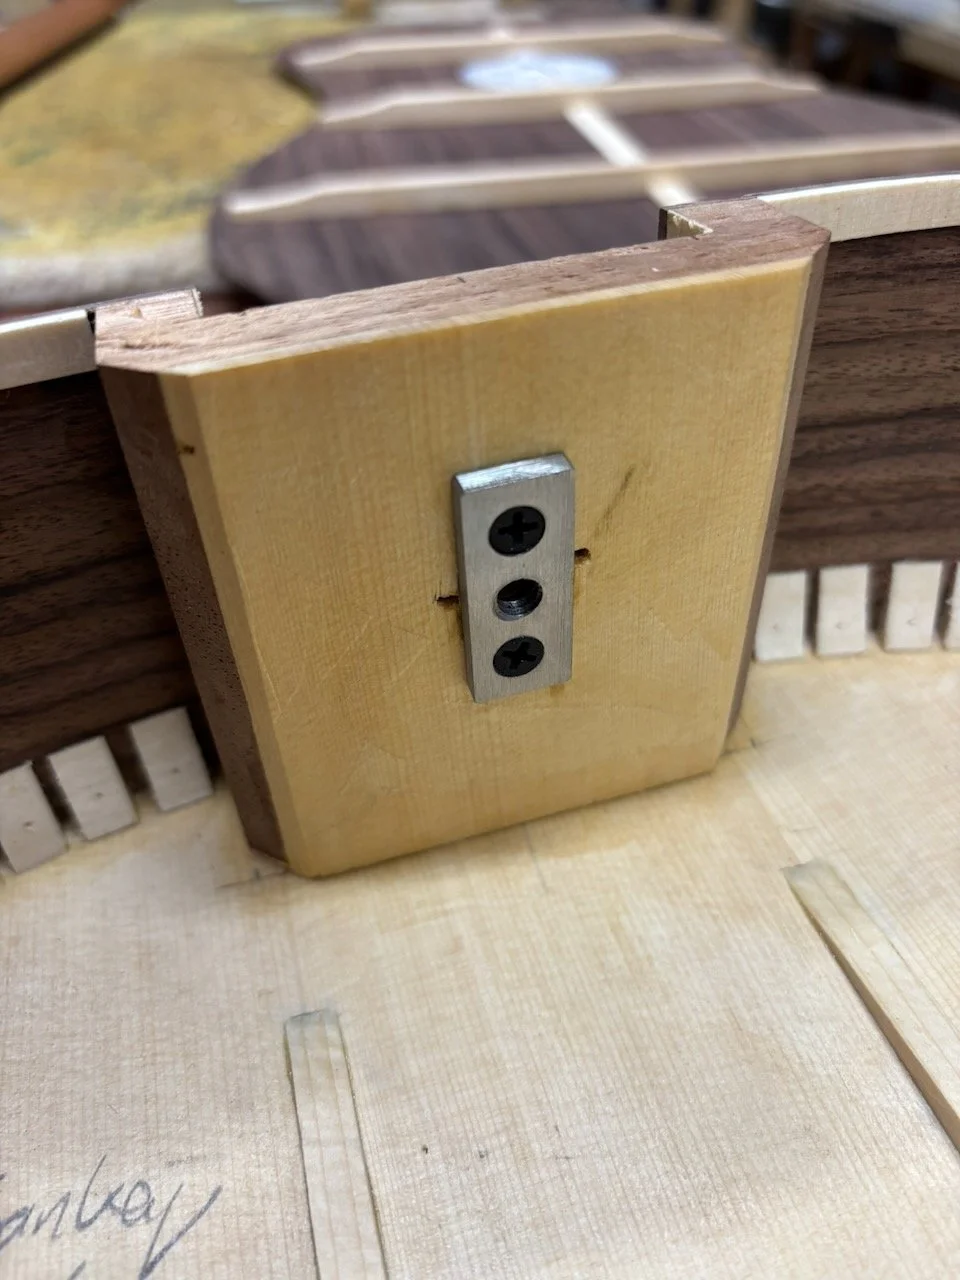
Future iterations will undoubtable be improved. Aesthetically, the internal block is rather clunky-looking. The hex key is smaller than I would like; ideally I would get some screws custom-made to my specifications at a good machine shop. And I think I will adjust the order of operations, make some better jigs in order to ensure the two nuts are perfectly aligned without effort. There is quite a bit of friction when turning the screw, and I think this could be improved through optimizing the thread interfaces.
But it’s a good start!
Quisque iaculis facilisis lacinia. Mauris euismod pellentesque tellus sit amet mollis.